This product is applicable to customers who hold multiple Wanlihui accounts and need to manage multiple Zyla accounts:
- Adapt to the collaboration of multiple subsidiaries of cross-border e-commerce group companies, or project-based/Amoeba business model
- Set the main account as the overall management account, and other business line/team collection accounts can be authorized to be associated with the main account

Multi-account management features include:
1. Bind/unbind master and sub-accounts (both 1master and sub-accounts can initiate operations)
2. The master account can view sub-account information (including account information and balance information) and download sub-account bills
3. Manage master and sub-account funds, including: automatic or manual collection of sub-account funds; transfer funds from the master account to the sub-account; transfer funds between authenticated sub-accounts
1. Begin with the multi-account management interface
- Log in to Zyla account, find “Multi-account Management” in the left directory and click to direct to this page
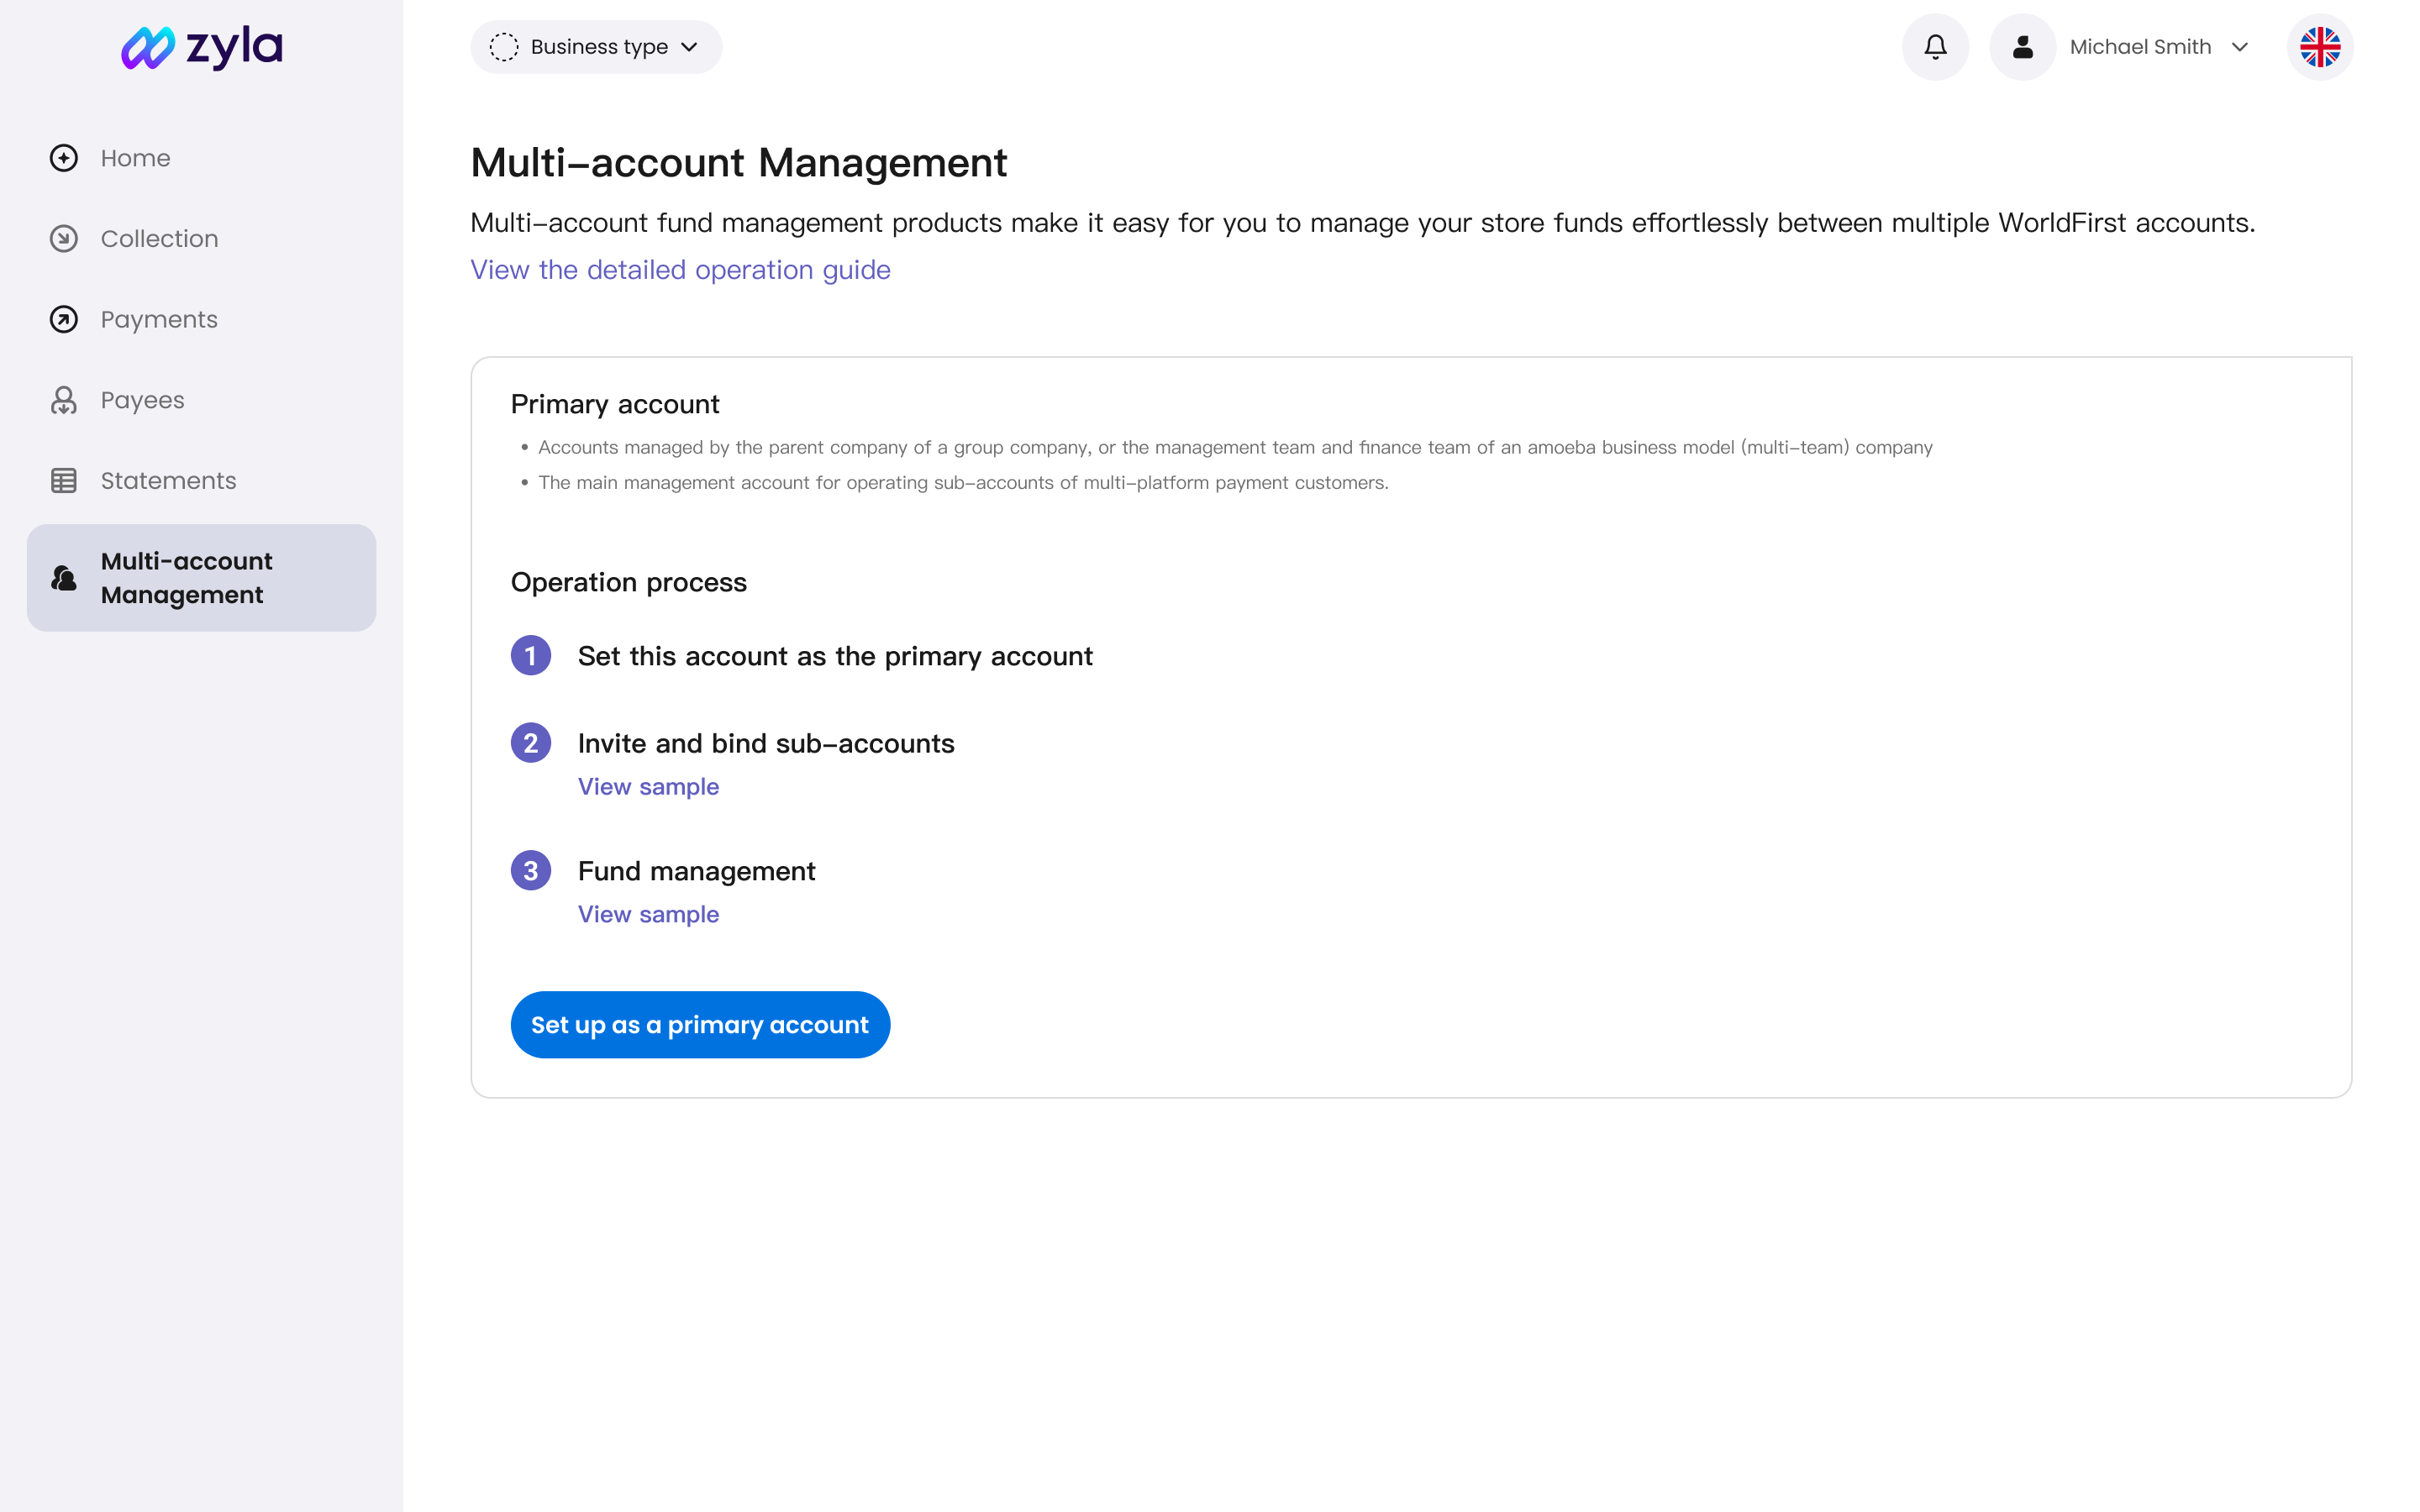
- Apply for multi-account management
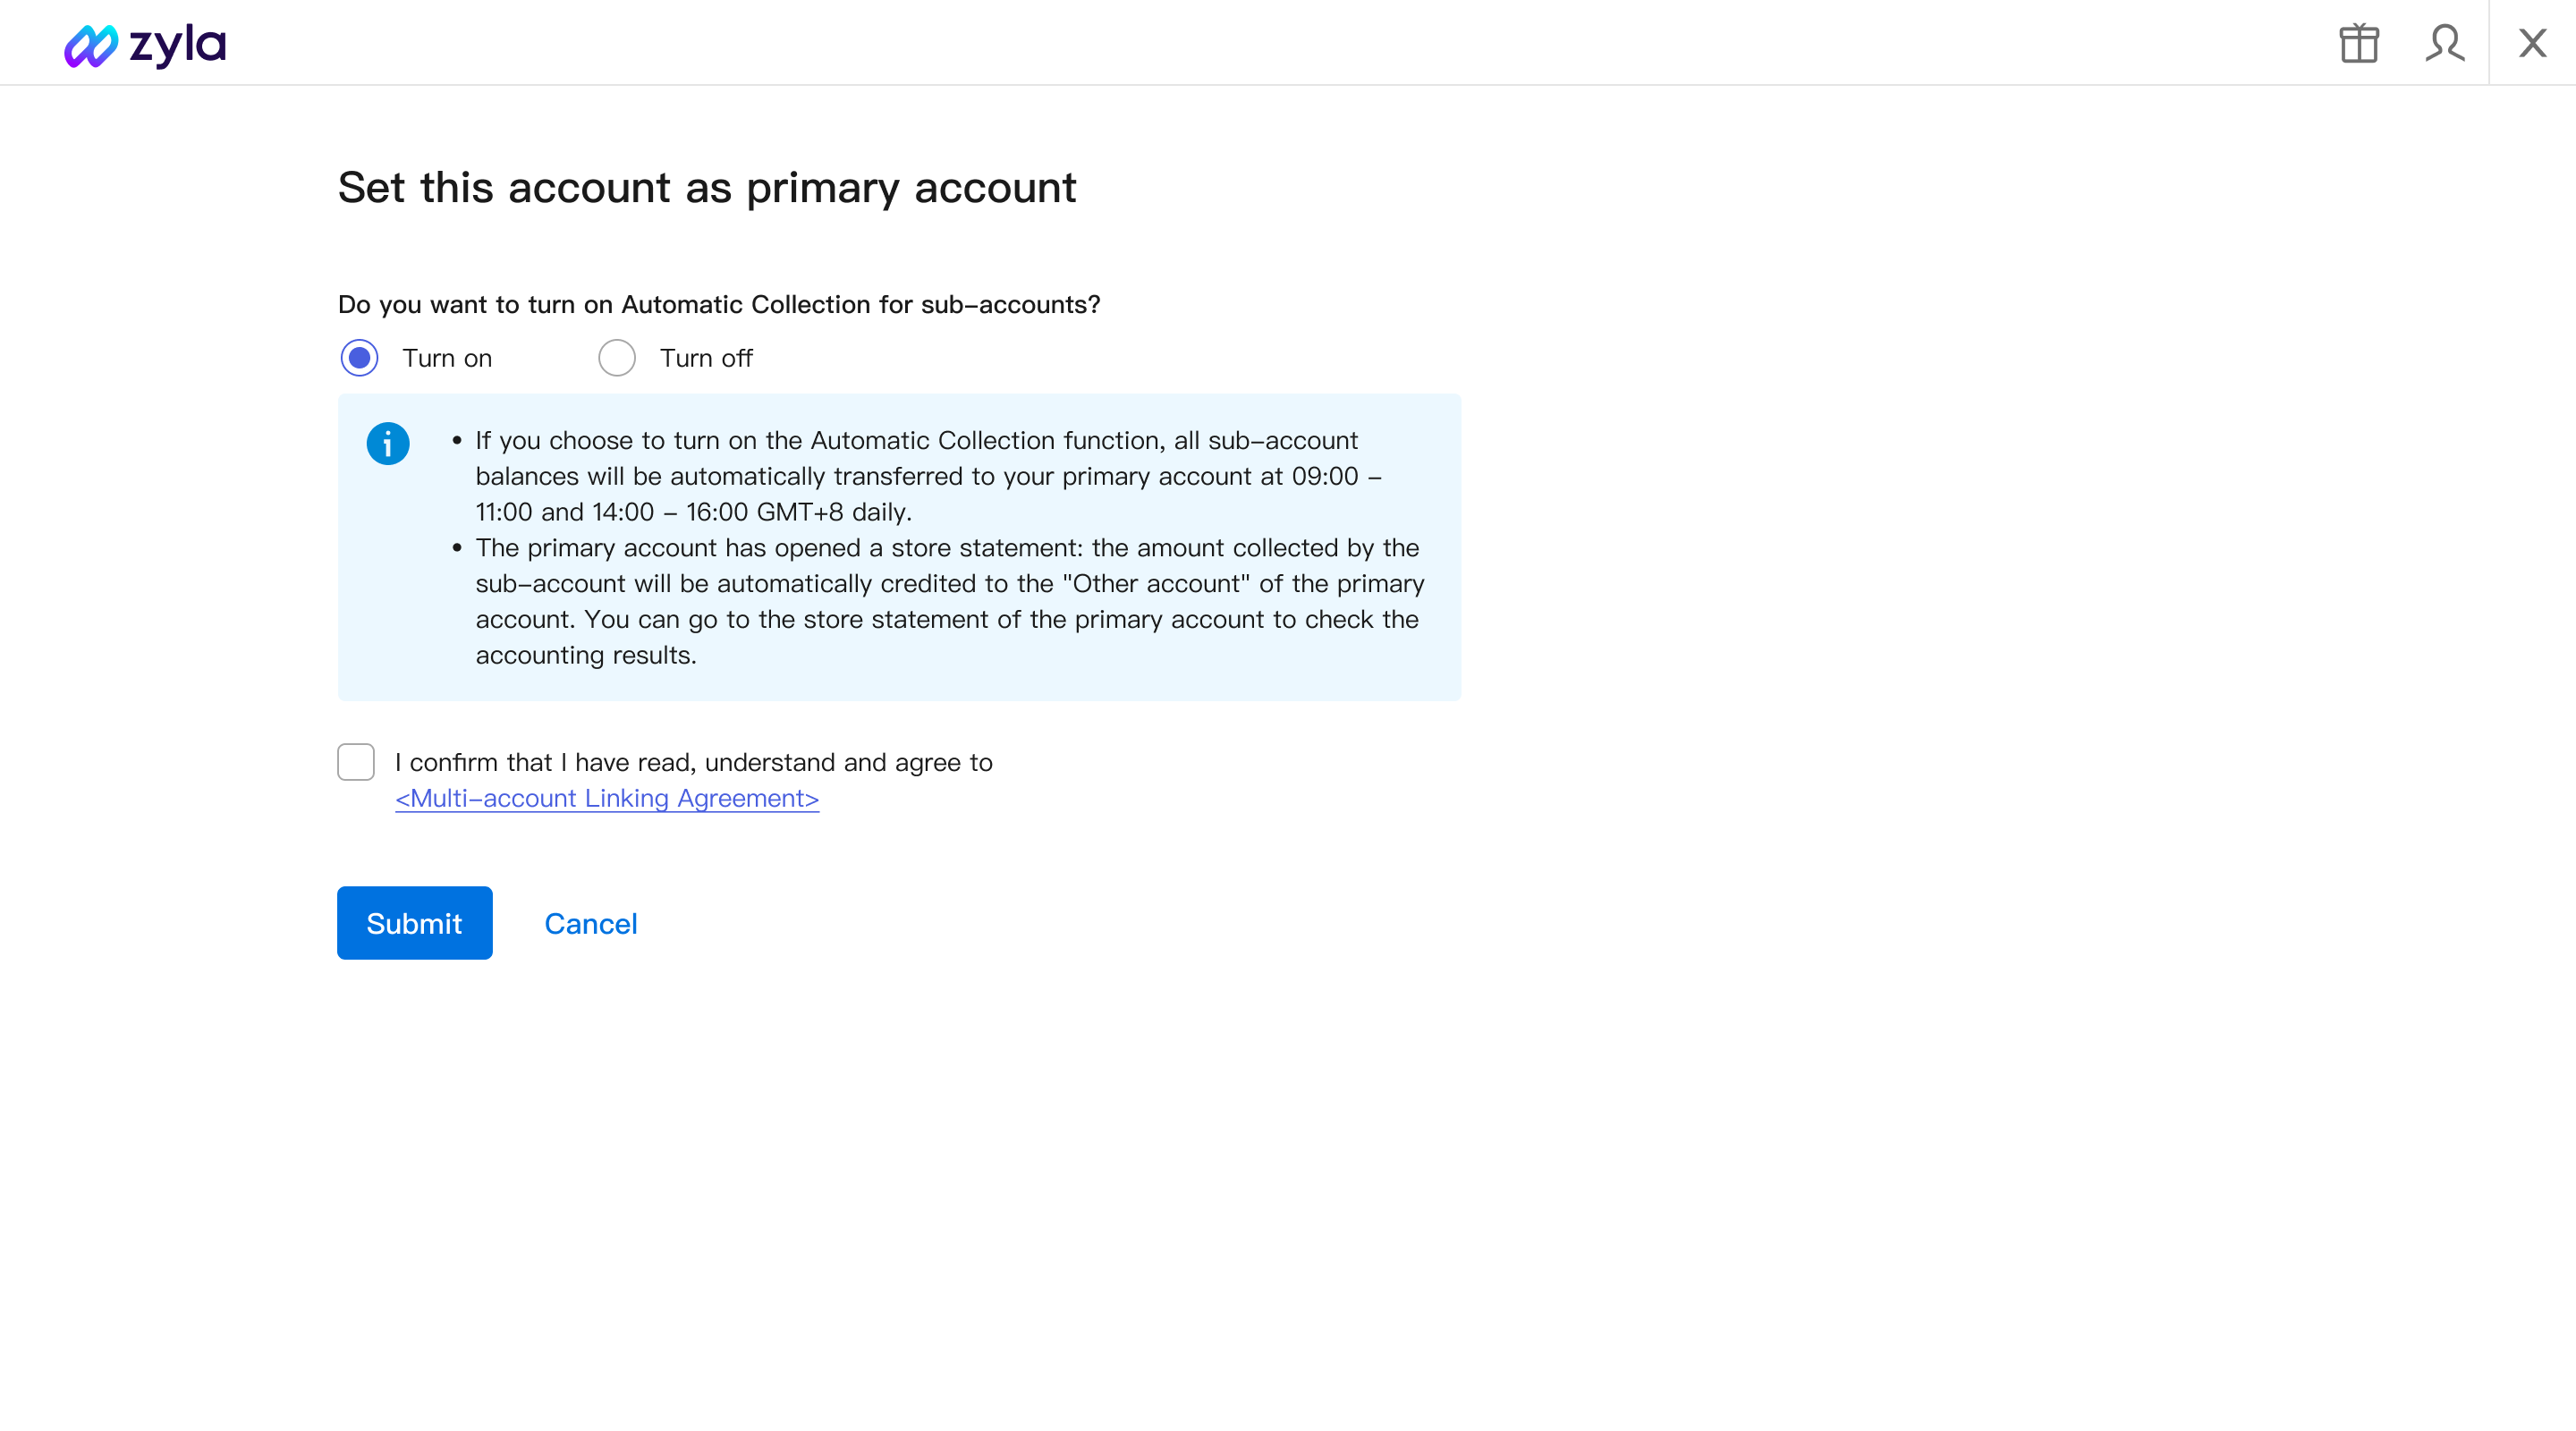
- Set as “Primary Account”
- After you apply this function to your BD/AM, Zyla will whitelist the function for you, you must verify yourself and agree with Zyla’s Terms
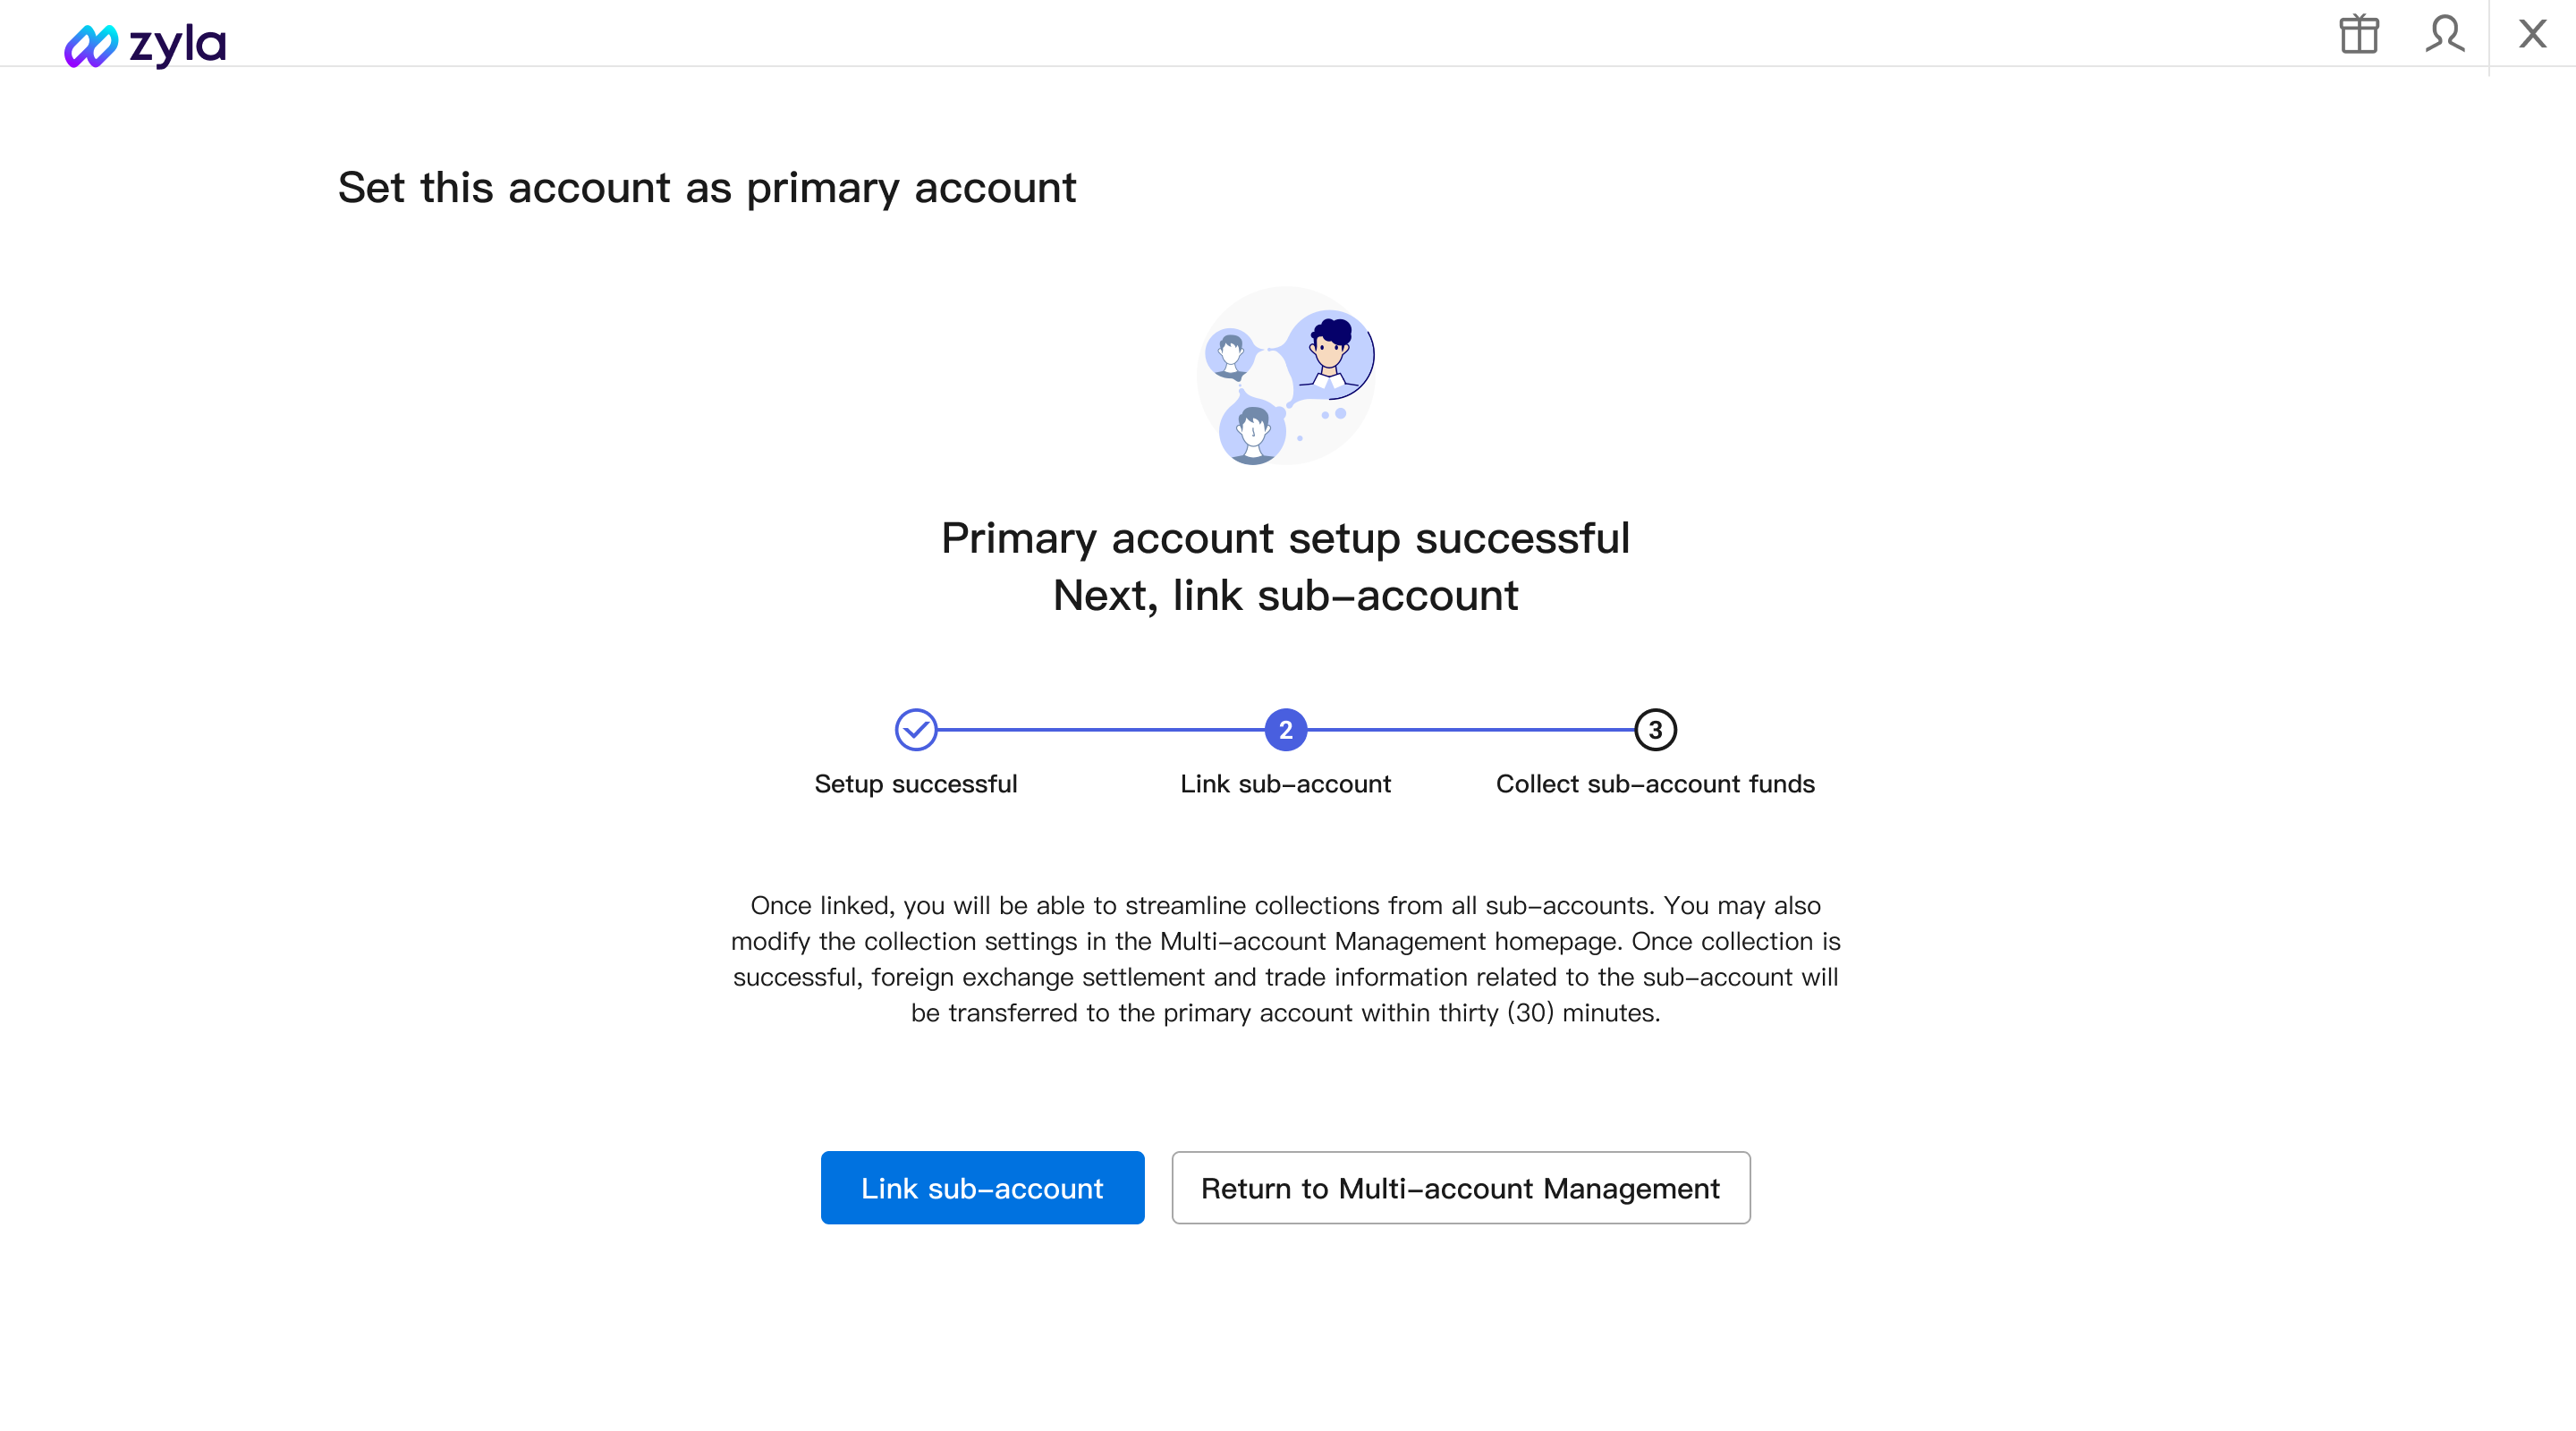
2. Bind Sub-account/Associated account
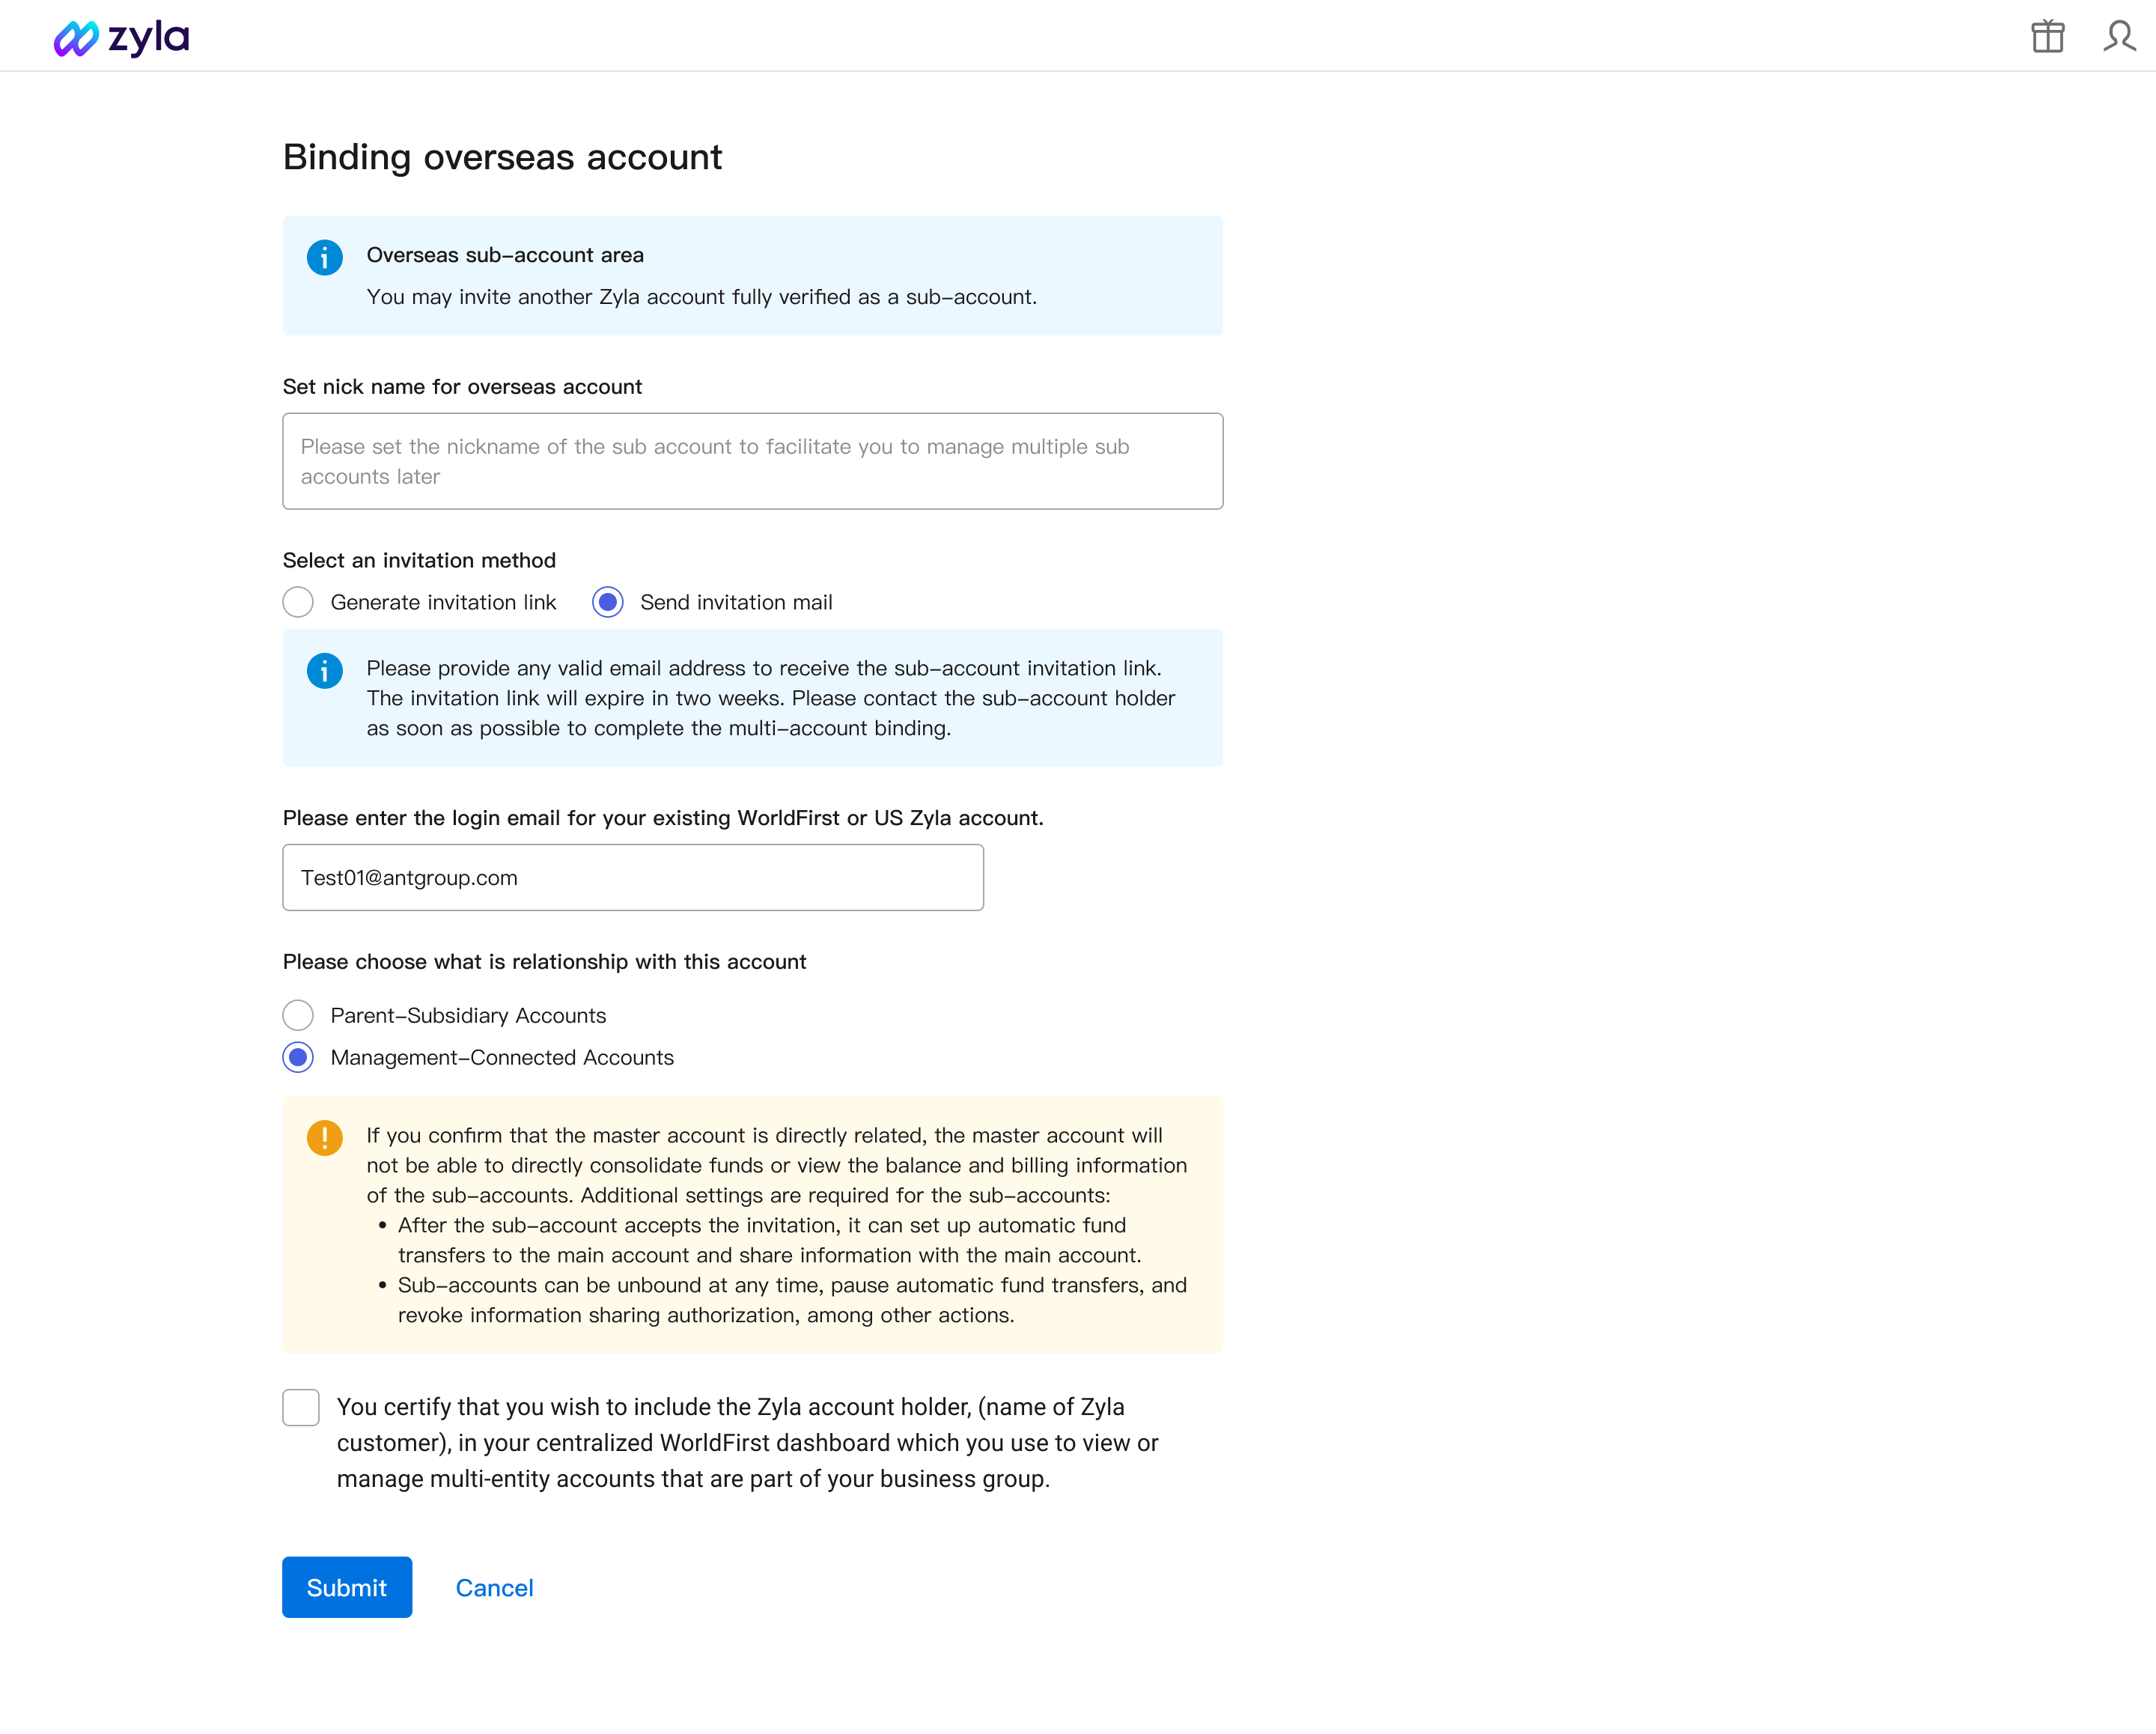
The Primary account invites an existing account to be bound as a sub-account
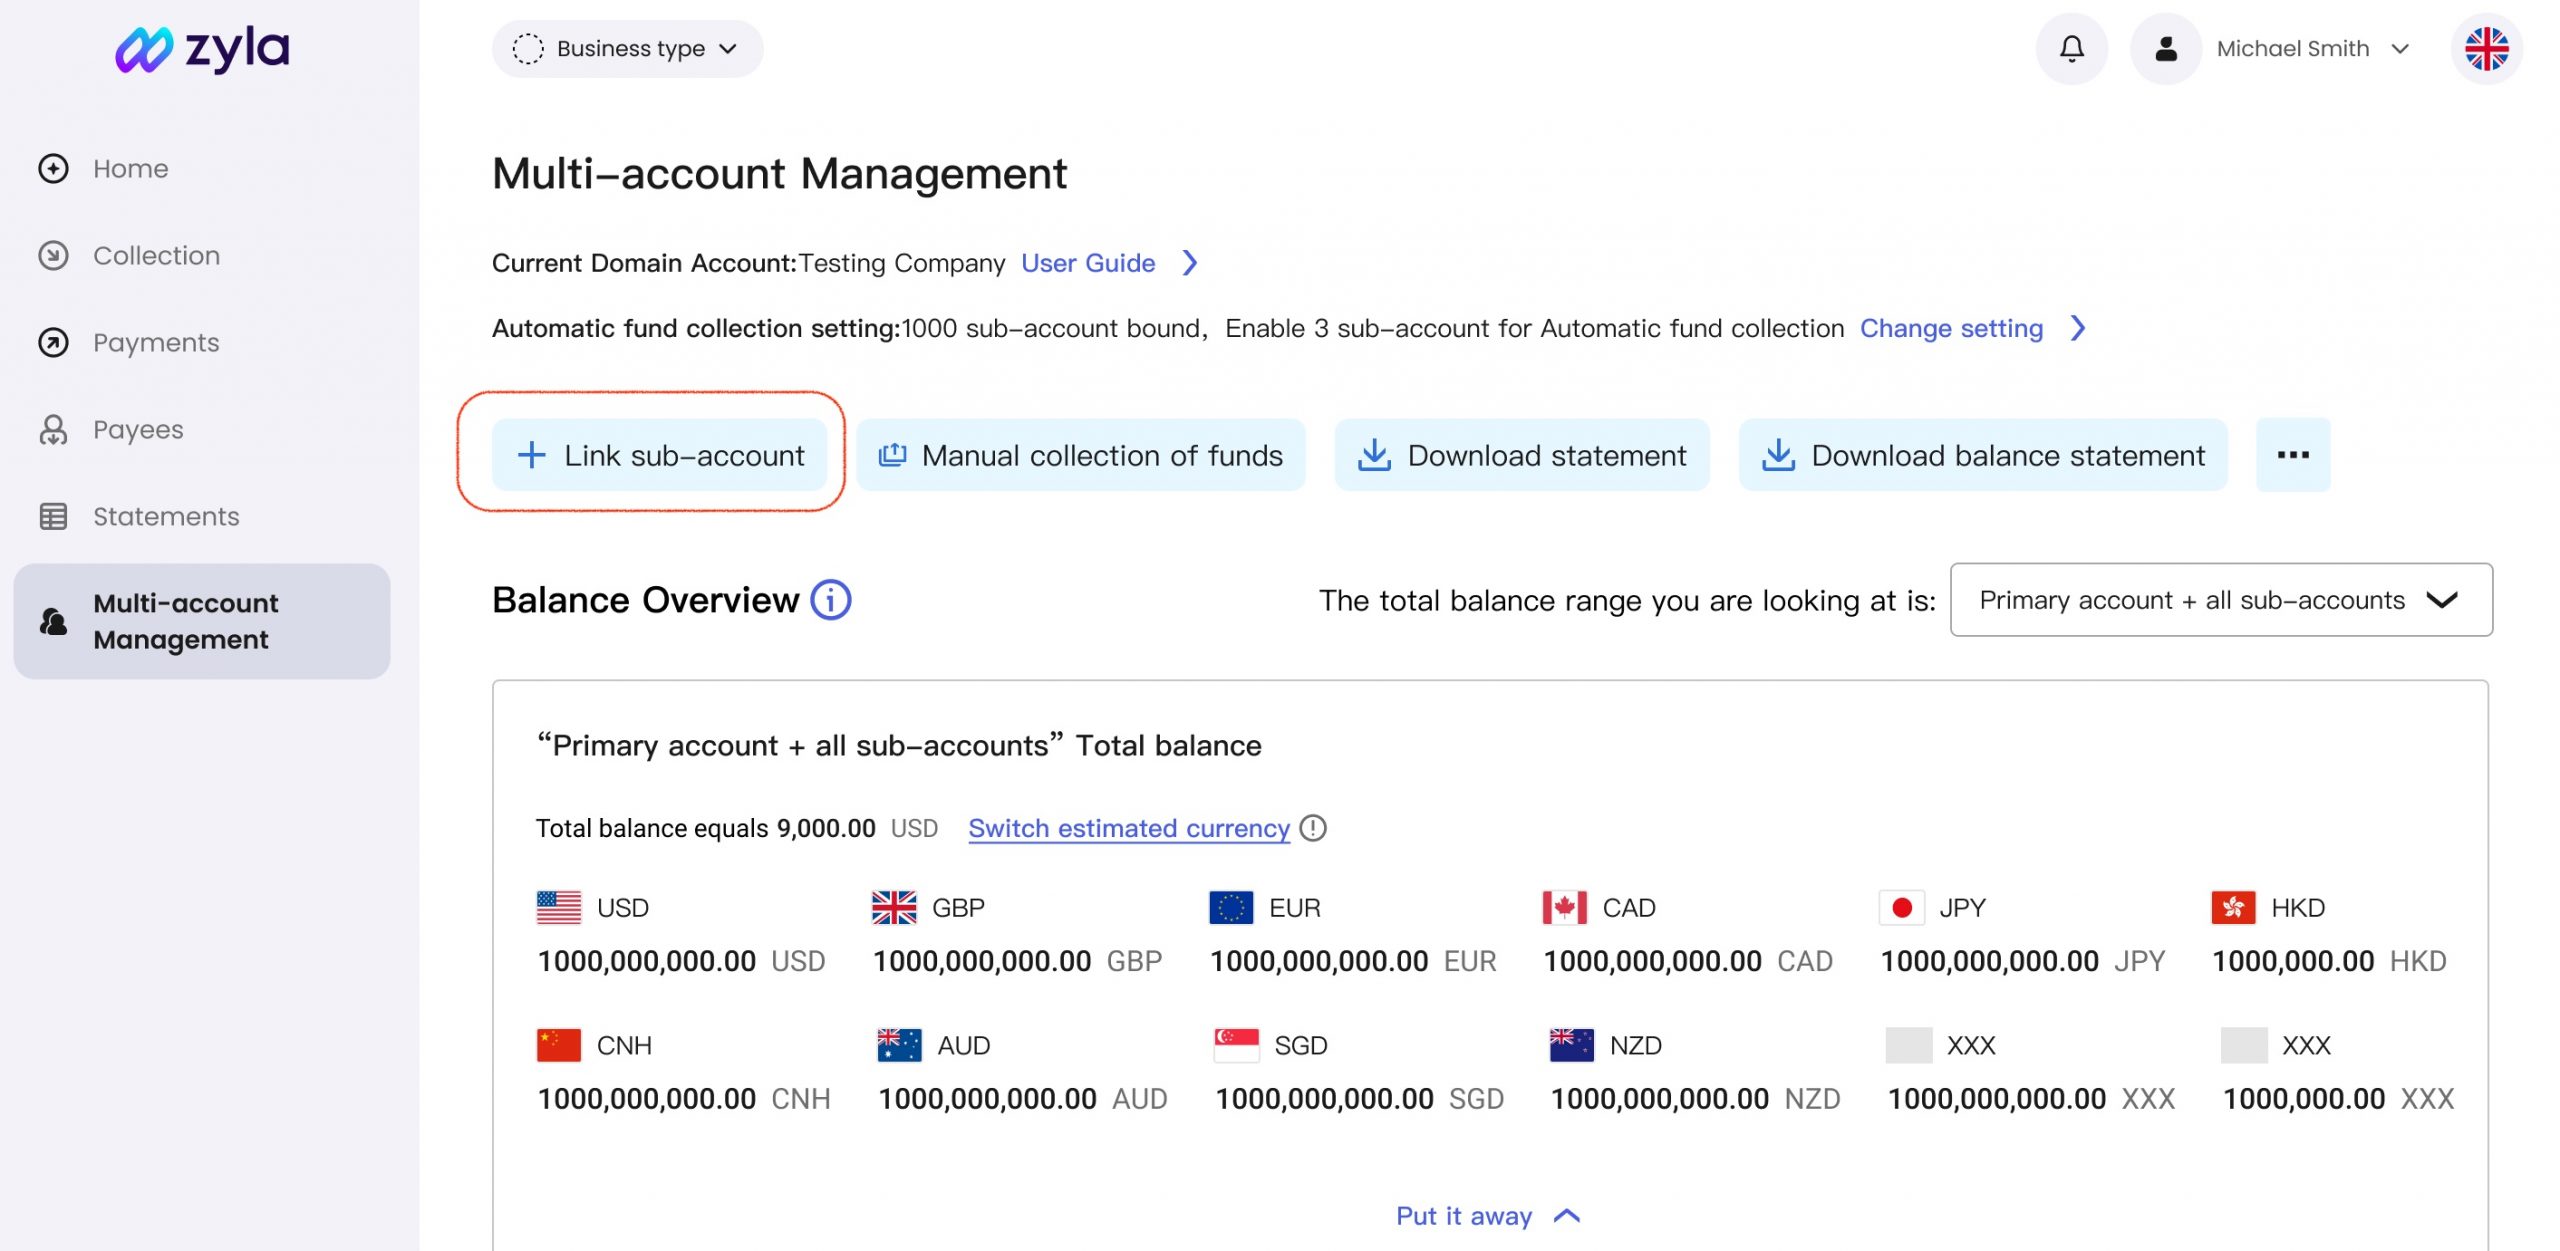
Primary acount POV – step by step guide
- Click “Link sub-account”
- Set sub-account nickname (Primary account needs to set up different nickname in order to seperate different sub-account invitation)
- Choose how to send invitation to sub-account based on your own habits
- Invitation link gerenrated:You can copy and send it to sub-account by SMS or instant messages
- Invitation link sent by email:You need to have sub-account’s email contact in advance and invitation will be sent to designated email address
- Select your relationship with the sub-account
- Master-sub accounts: need to have common ownership or director
- Management-Connected accuonts: No ownership required
- After inviation sent, you can check the progress on Main interface
Noted:
- Invitation link will be expired in 14 day. After expired, primary account needs to re-send invitation.
- Multi-account management function only works for Zyla & Zyla account who had verified and onboarded. Otherwise, the binding will failed for not-yet-verified Zyla account.
Sub account POV – step by step guide
- Received invitation from email
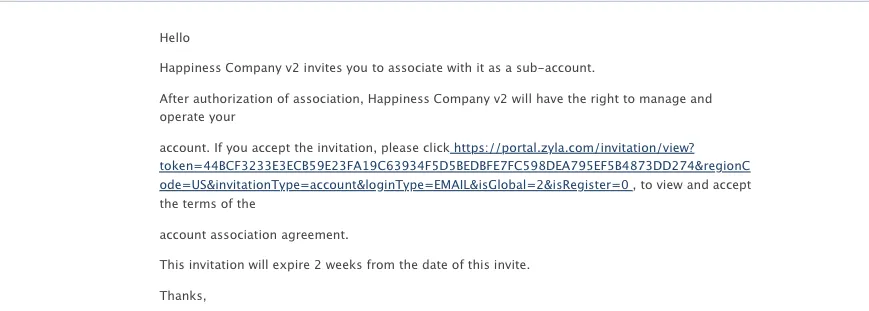
- Sub-account login to its account and agree to Terms and condition
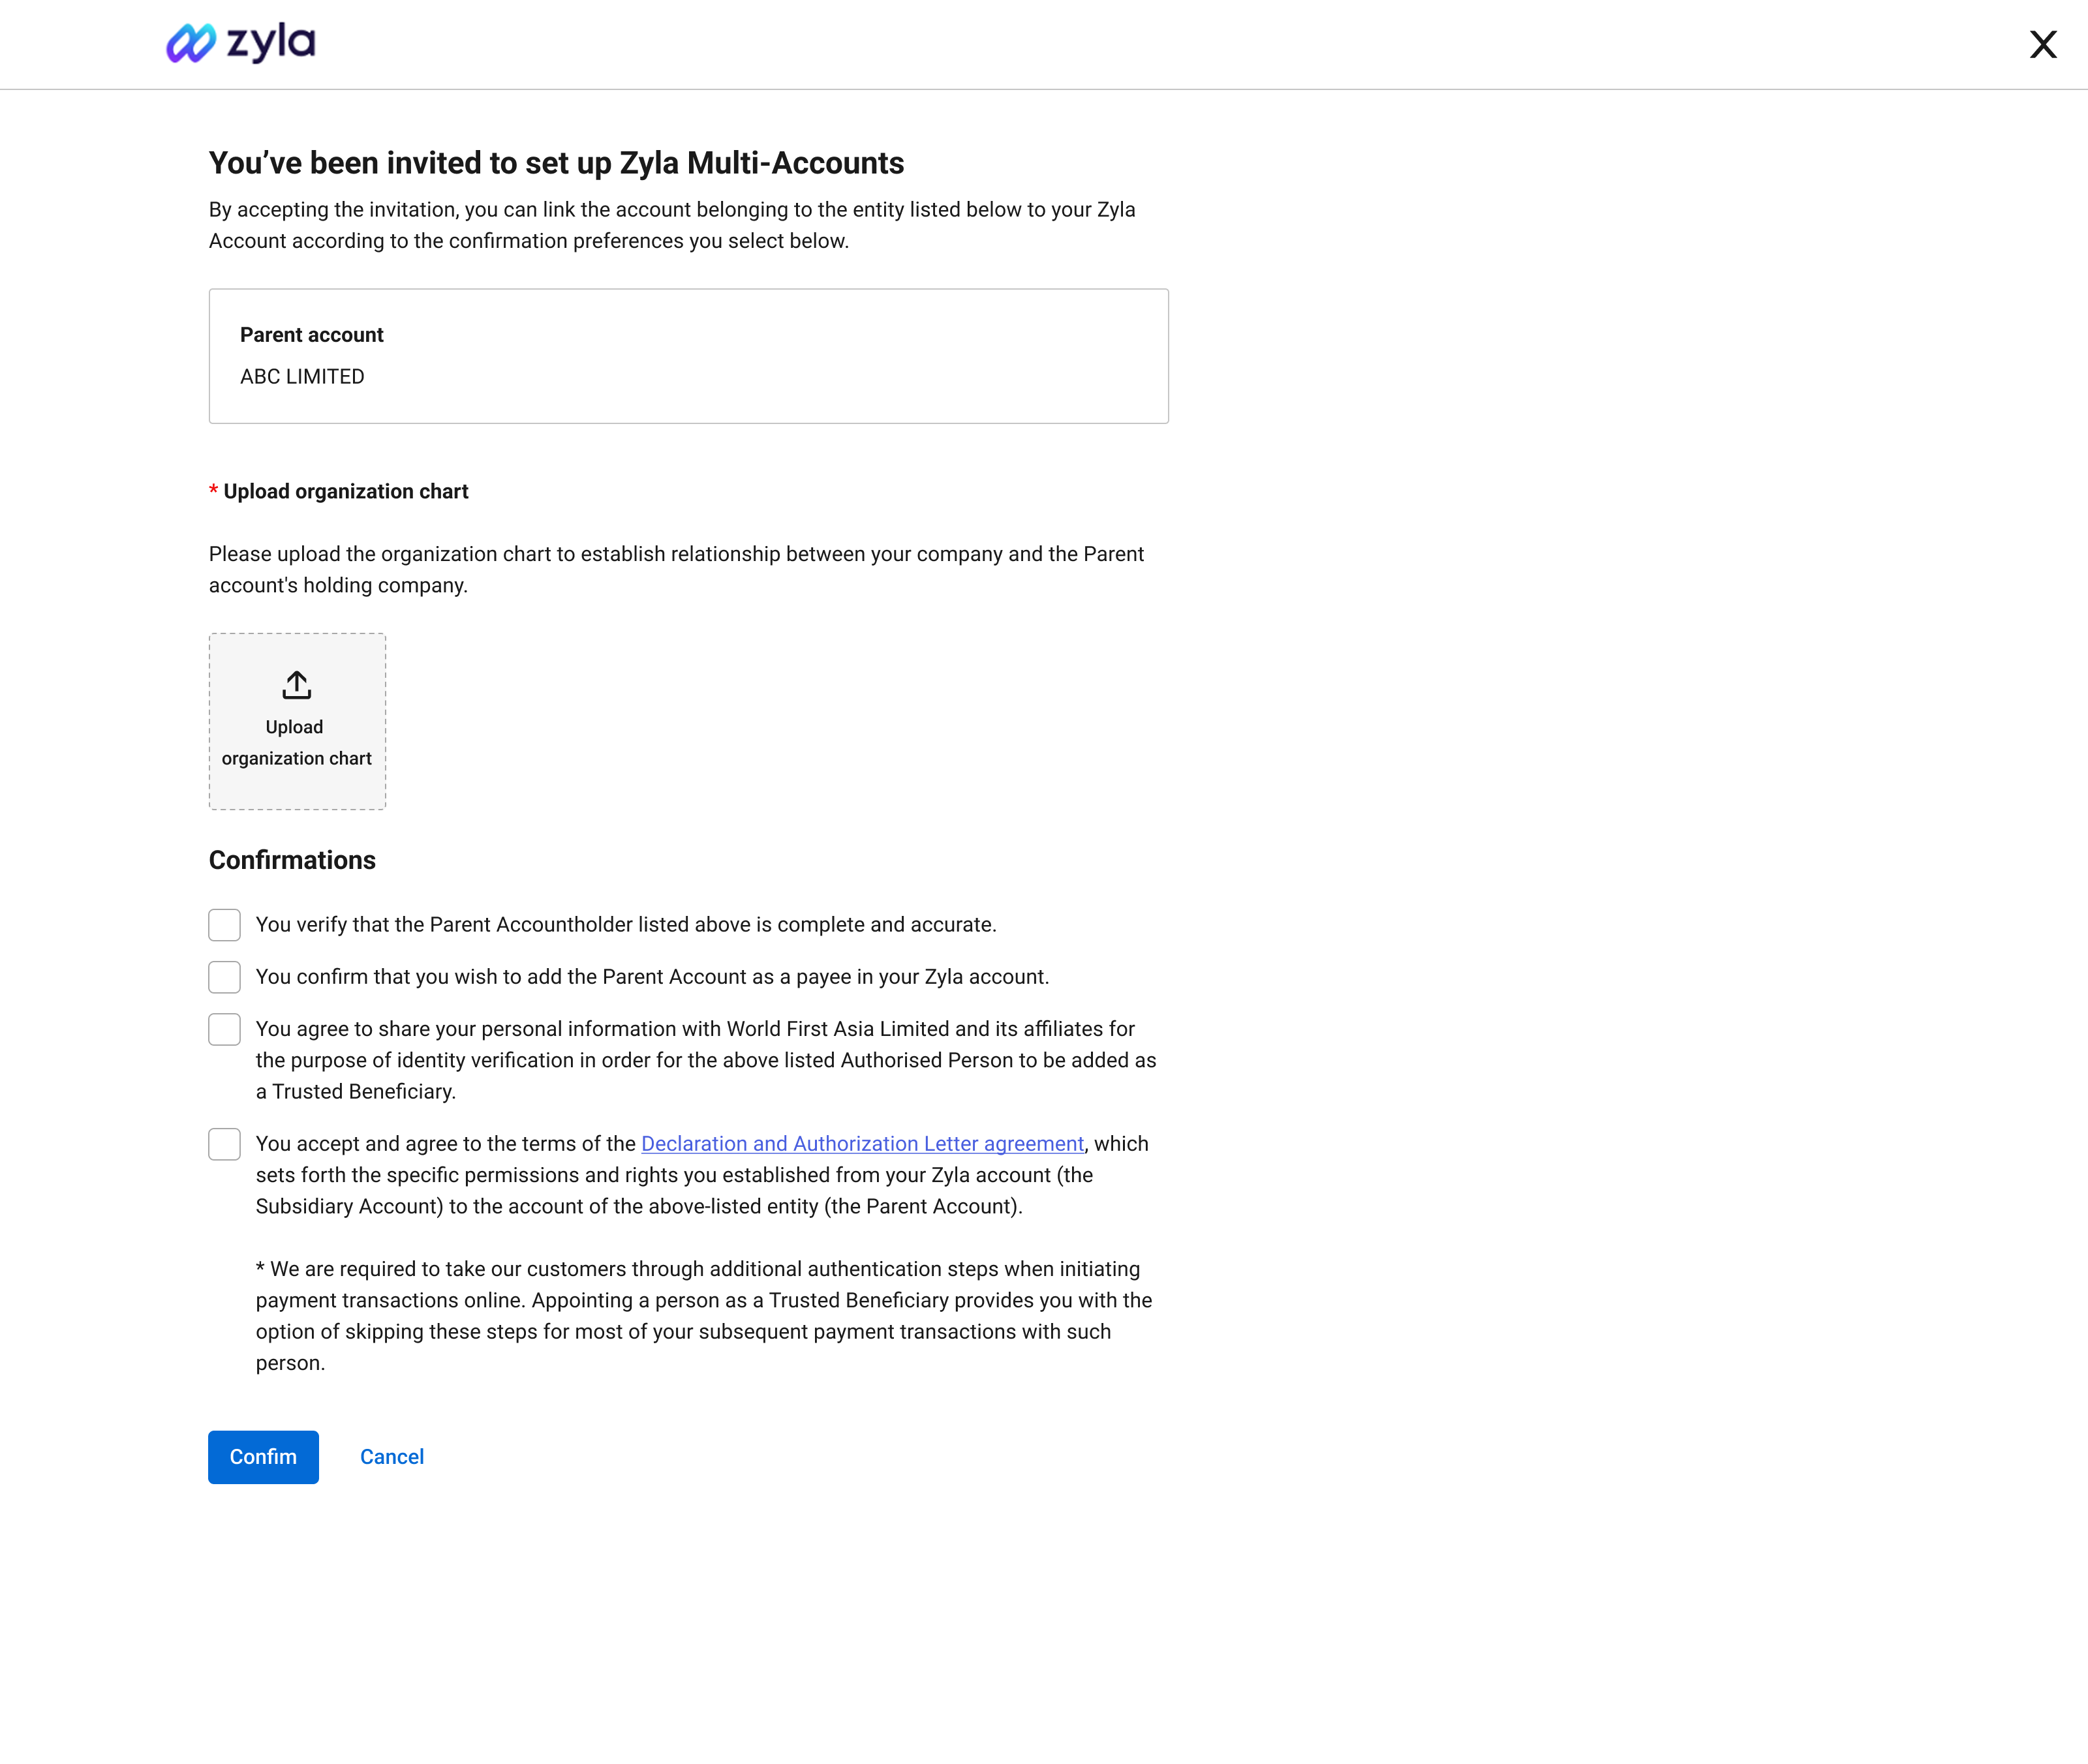
- This is for Master- Sub account relationship
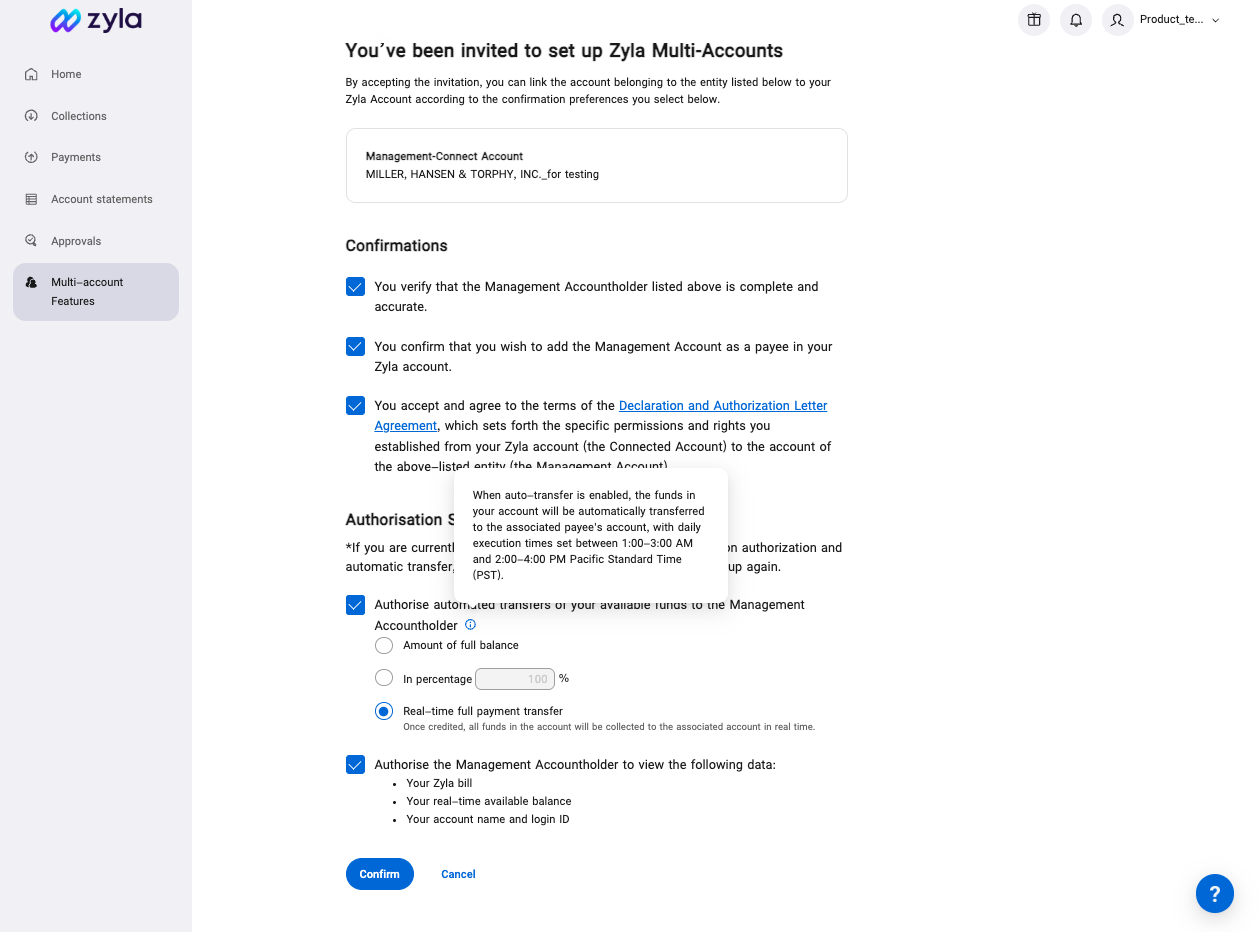
- This is for Management- Connected account relationship
- This is for Master- Sub account relationship
- After binded, Primary account could see the sub-account as “Linked
3. Multiple account unbind
Unbind from primary account
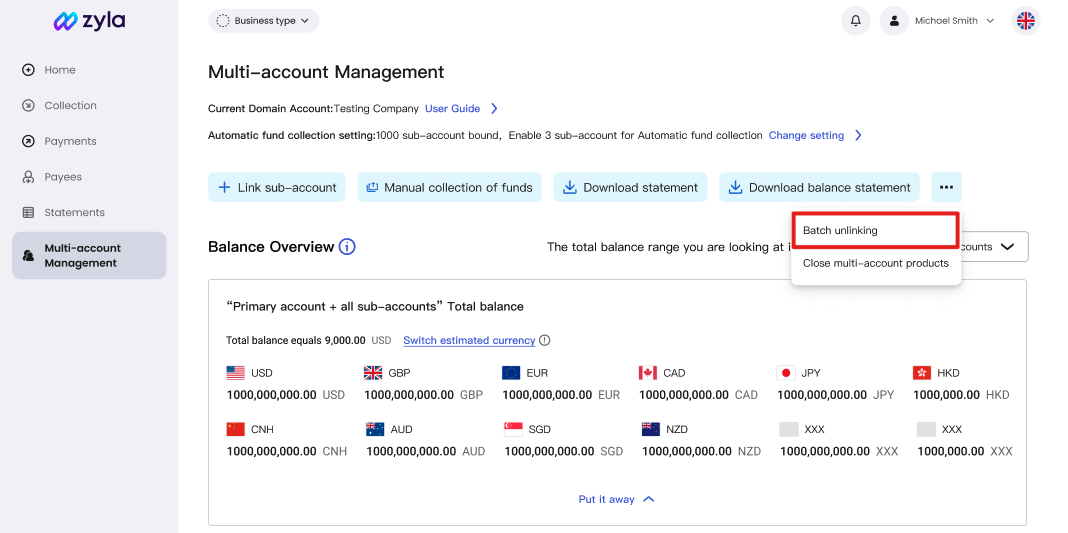
- Initiated by the main account: Click to enter “Multi-account Management”
- Click “…” → “Batch Unbinding Accounts”
- Check the accounts to be unbound, click Next, and click “Confirm Unbinding” after confirmation
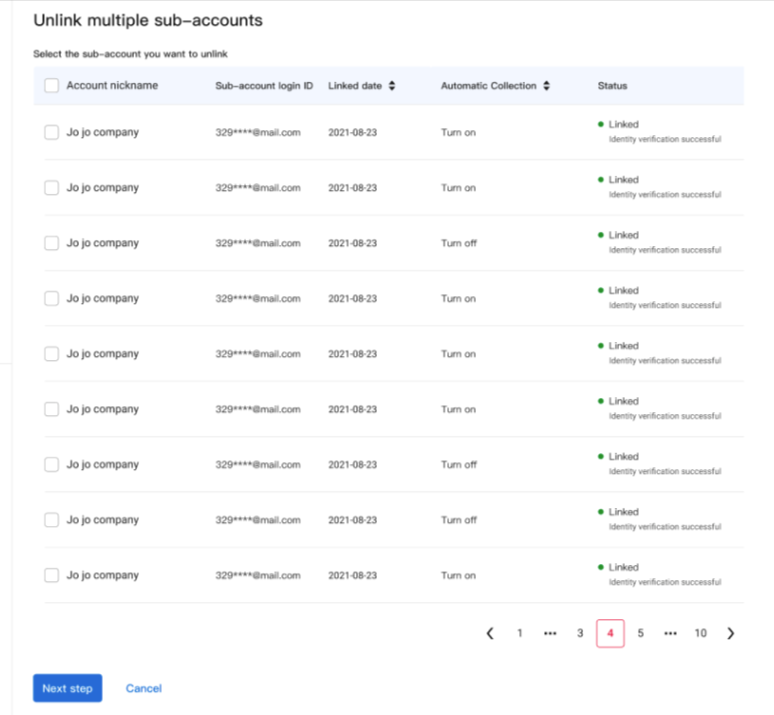
Note: There is no limit on the number of sub account selected to unbind.
Unbind from sub account
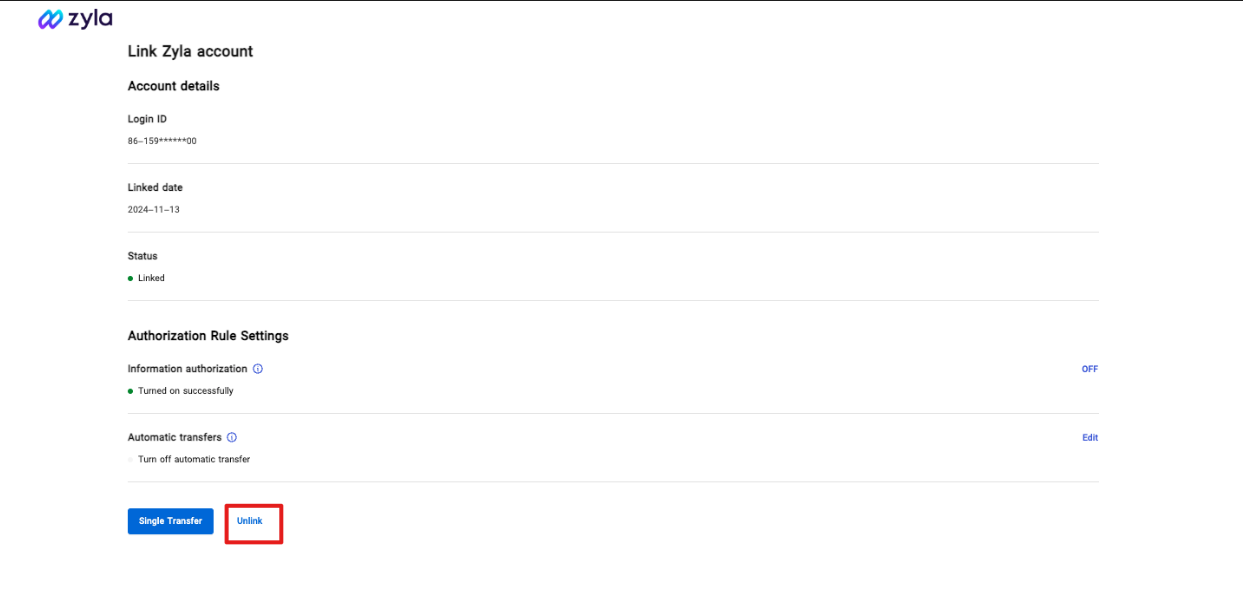
- Initiate from a sub-account: Click to enter “Multi-account Management”
- Click “Unbind” in the main account list, and confirm to complete the operation
4. Multi-account management-information management
Check multiple account binding relationships
From primary account perspective
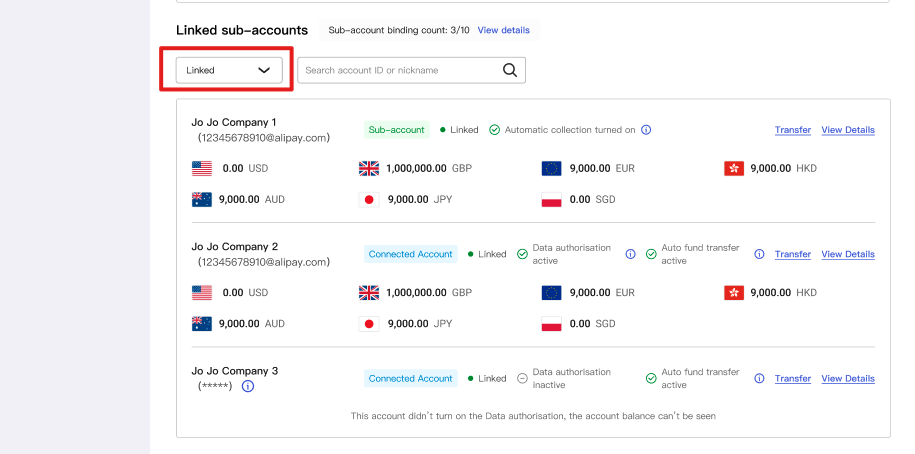
- Log in from the main account: Click to enter “Multi-account Management” and view the “Sub-account List”
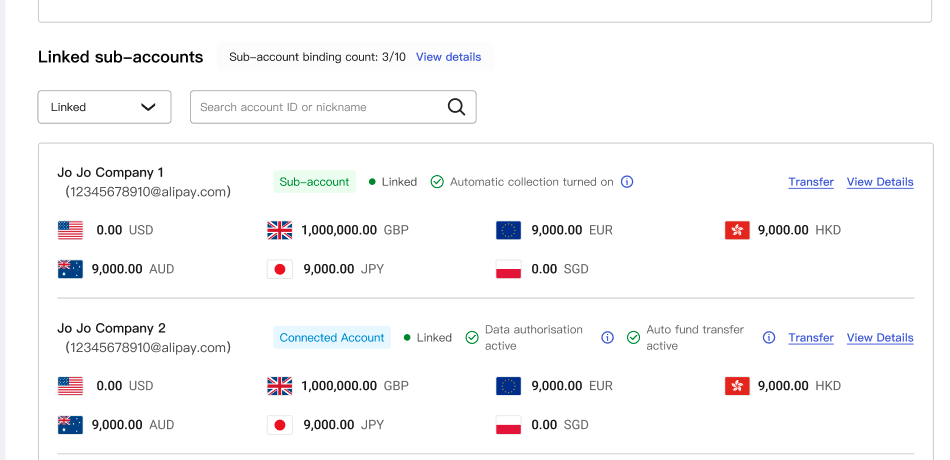
- Select “Already bound” to view the bound sub-account information
- Click “View details” to query more information
- Sub-account nickname, login external label
- Sub-account binding status, collection rules
- Sub-account multi-currency balance
- Select other bound status accounts to view the sub-accounts of the corresponding bound processes
From sub account perspective
- Log in from a sub-account: Click to enter “Multi-account Management” to view the main account information
Check and adjust sub-account information (only supports primary account operations)
View sub-account balance
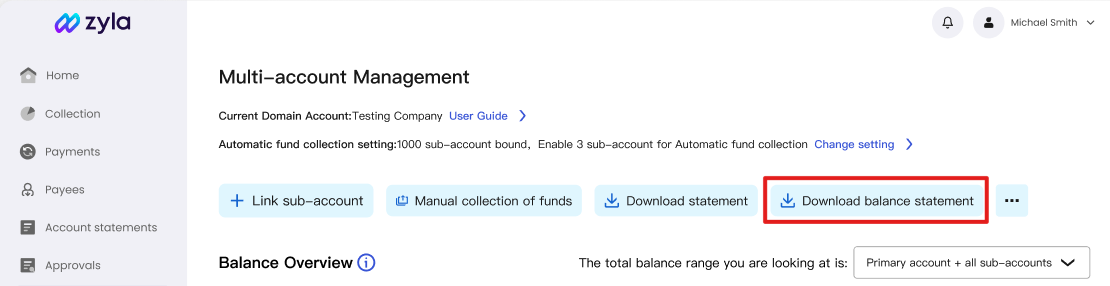
Method ①: View all the funds of the master account or all sub-account funds in different currencies. You can adjust the balance range as needed.

Method ②: Download multiple account balance details (supports excel and csv formats)
Download sub-account statement
- The master account can download the master and sub-account statements or corresponding transaction records by selecting [Download statement] on the homepage of the [Multi-Account Management] module
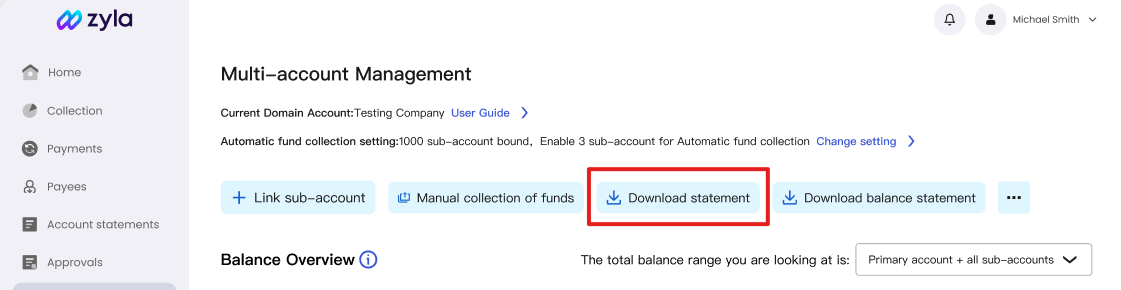
- When downloading bills, you can choose to download the main and sub-account compound statements, all or specific sub-account statements
Increase the number of sub-accounts that can be bound (only supports main account operations)
When the number of sub-accounts that can be bound to the main account is less than 30% of the current sub-account capacity, you can apply to increase the number of sub-accounts that can be bound, that is, “expand the capacity” of the sub-account.
Operation entry: Enter the “Sub-account List” module, click “View Details” next to “Number of Sub-account Bindings”, and click “Apply for Expansion” (the default total number of sub-accounts that can be bound is 10)

Note: Each time you successfully apply for expansion, you can increase the amount of 10 sub-accounts that can be bound based on the number of sub-accounts that have been bound.
5. Multi-account management-fund management
Sub-account fund collection (For parent-child relationship)
Automatic fund collection
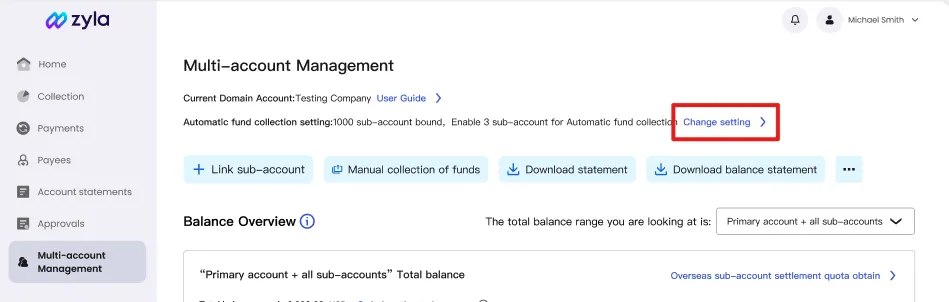
- Initiate from the main account: Click to enter “Multi-account management”
- Click the collection settings button “Go to settings”
- Enter “Automatic collection settings”
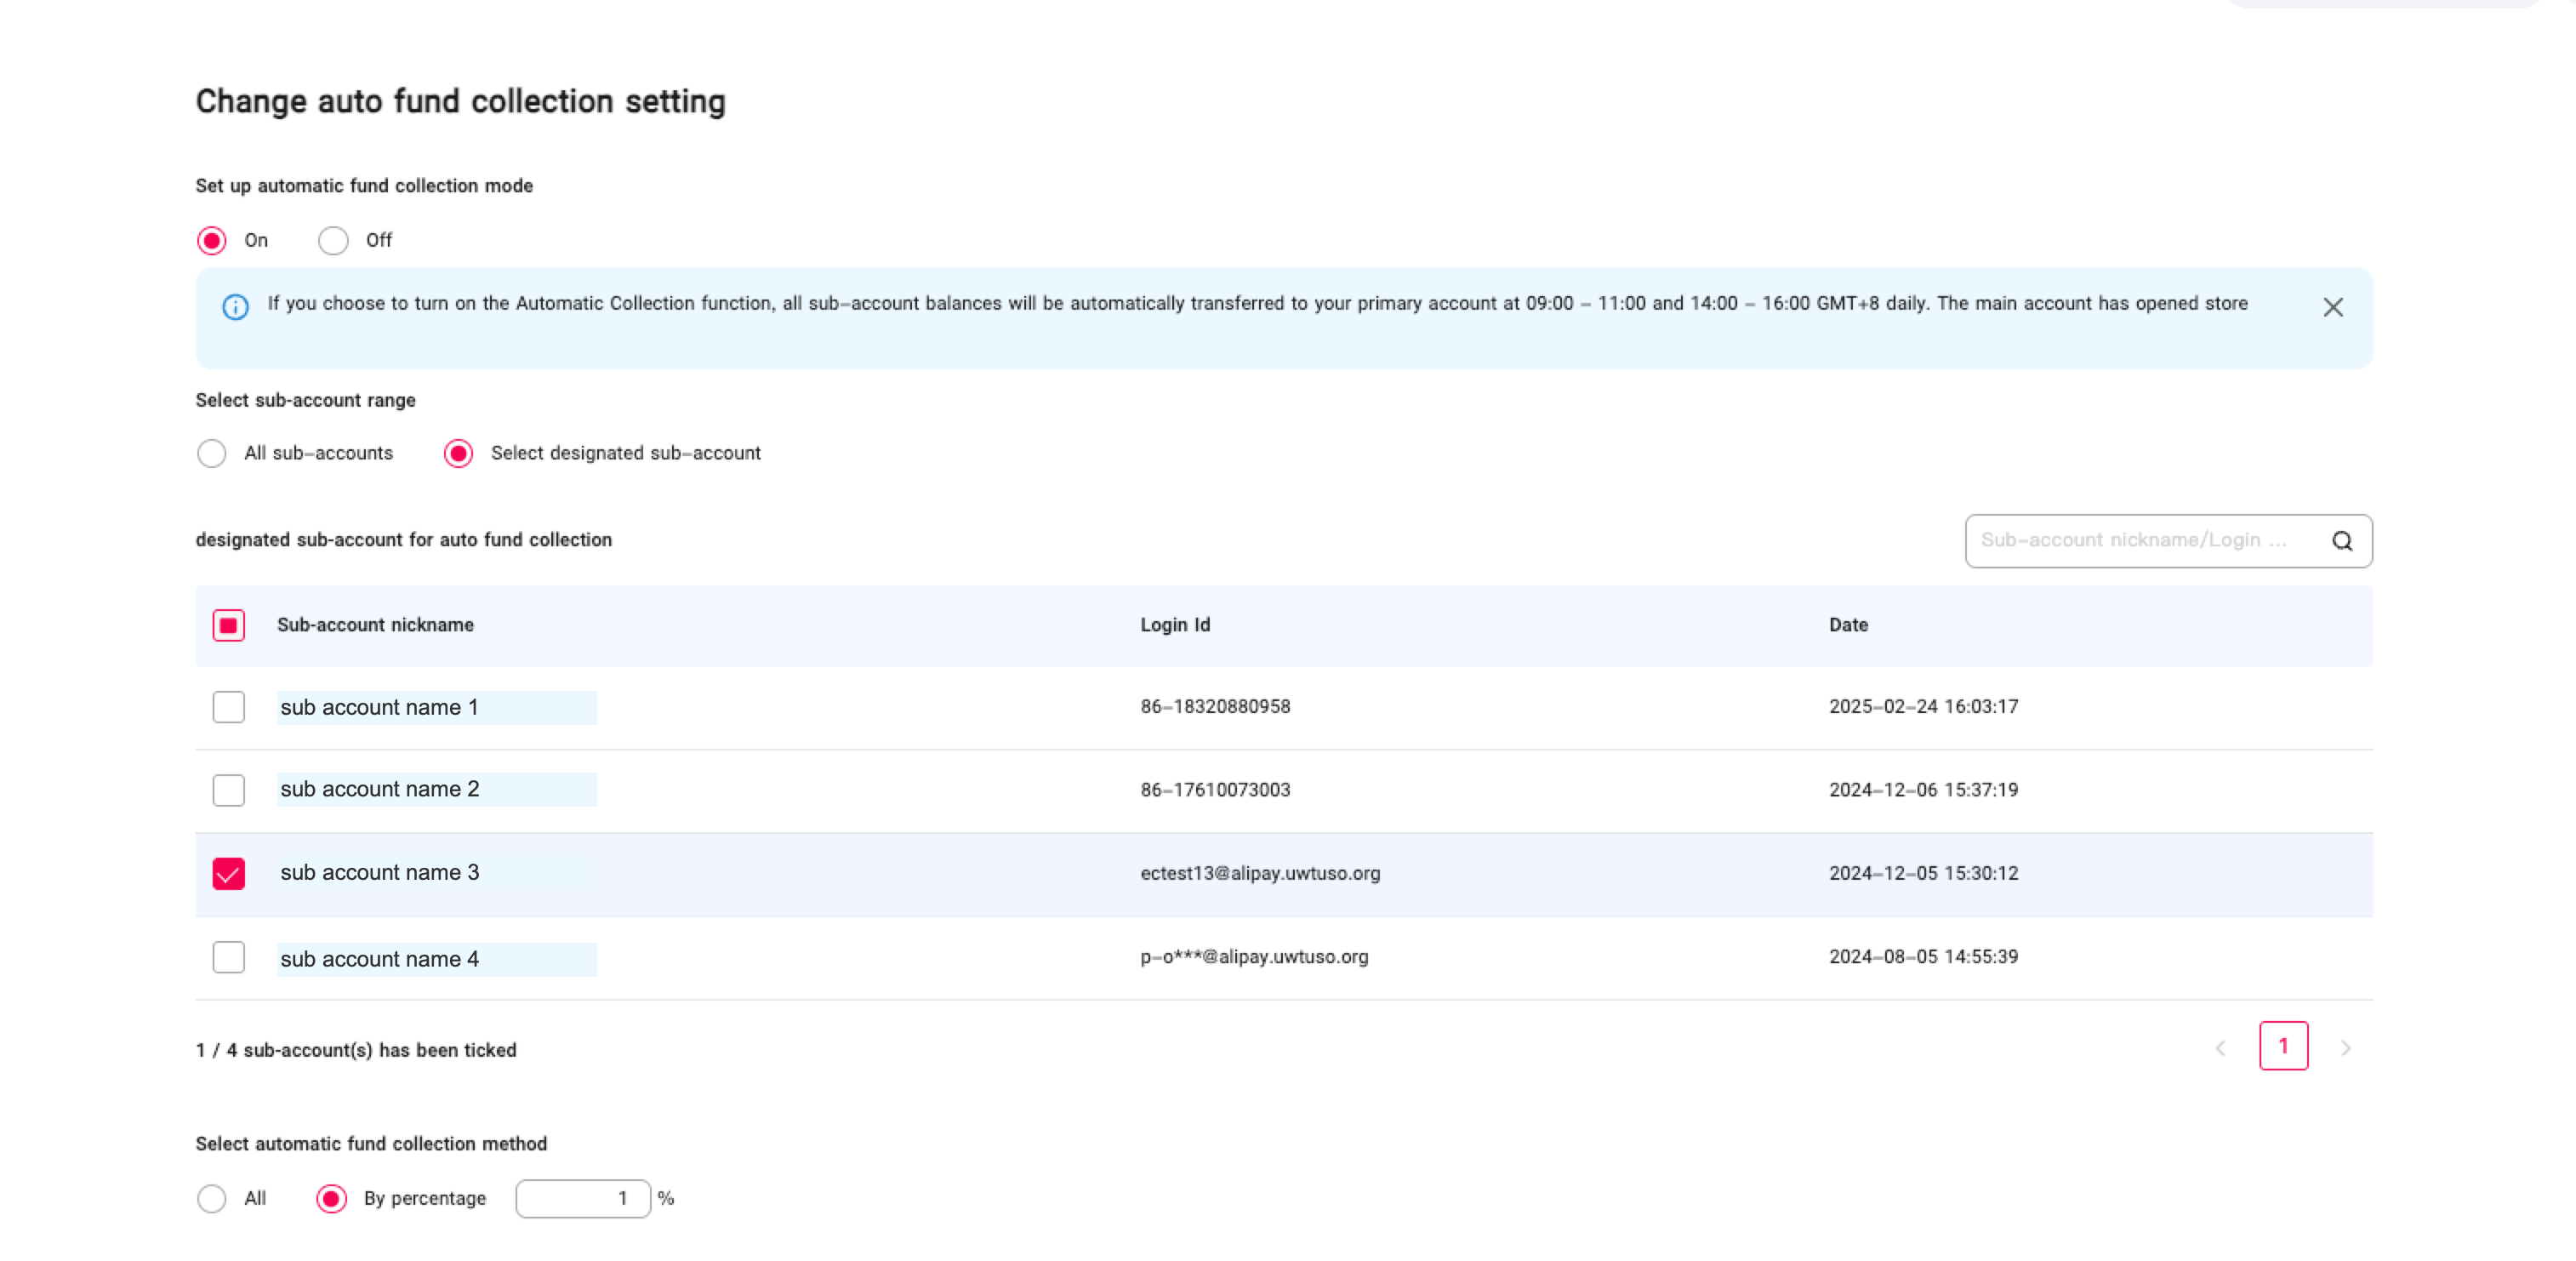
- Click “Enable” and follow the prompts to complete the automatic collection rule settings
Notes:
- If you choose to enable the automatic fund collection function, the specified proportion of the selected sub-account balance will be automatically transferred to the main account from PST 1:00AM to 3:00AM and 14:00PM to 16:00PM every day.
- For sub-accounts that do not enable automatic fund collection, if you need to obtain funds from these sub-accounts, you need to log in to the main account and initiate manual fund transfer to complete the fund transfer.
Instructions for setting up the collection rules:
- You can choose whether to collect all sub-accounts – Support automatic collection of specific sub-accounts (the remaining unselected sub-accounts will not be automatically collected)
- You can choose the percentage of sub-account funds to be collected – Support the selected sub-accounts to retain a certain amount of funds without being collected
Notes:
- You can view the “fund collection” transaction type bills in the transaction bills of the main account and sub-accounts
- Automatic collection only supports automatic collection between the main account and the sub-account with the same currency. If the currency of the sub-account’s receiving account is different from that of the main account, the receiving account of this type of receiving currency will be automatically added to the main account during fund collection for automatic fund collection
Manual fund collection
If you do not need to enable automatic collection, and only need to collect funds from sub-accounts occasionally or irregularly, or if you do not want automatic collection for some sub-accounts and need to operate separately, you can use the “manual fund collection” function.
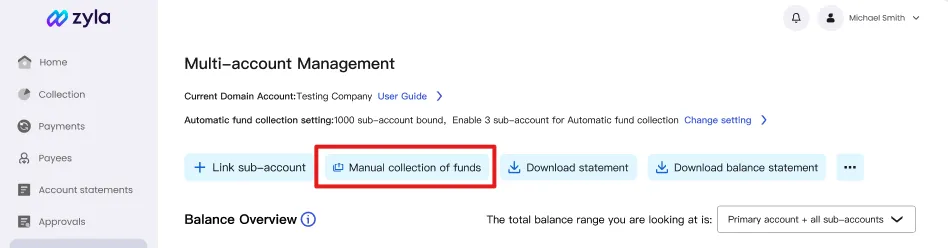
- Initiate from the main account: click to enter “Multi-account Management”
- Click “Manual Fund Collection”
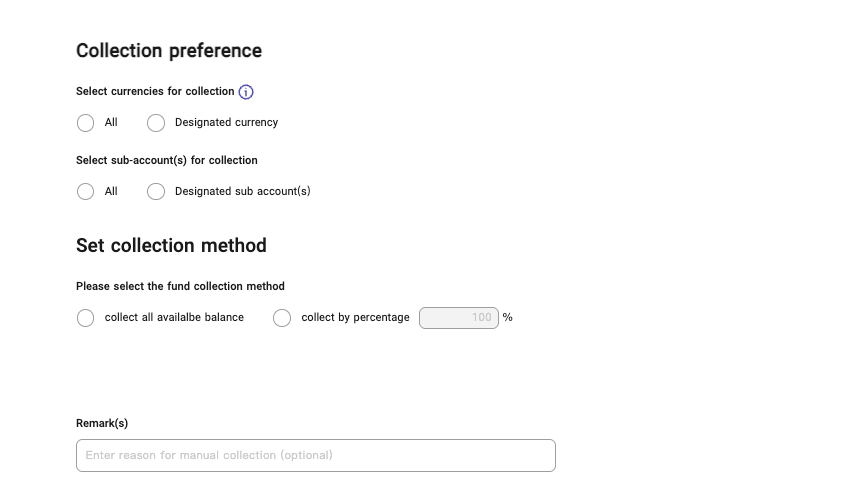
Manual collection rules are similar to automatic collection rules. The master account can select collection objects and set collection methods. (For details, please refer to the collection rule setting instructions in Section “Automatic fund collection”)
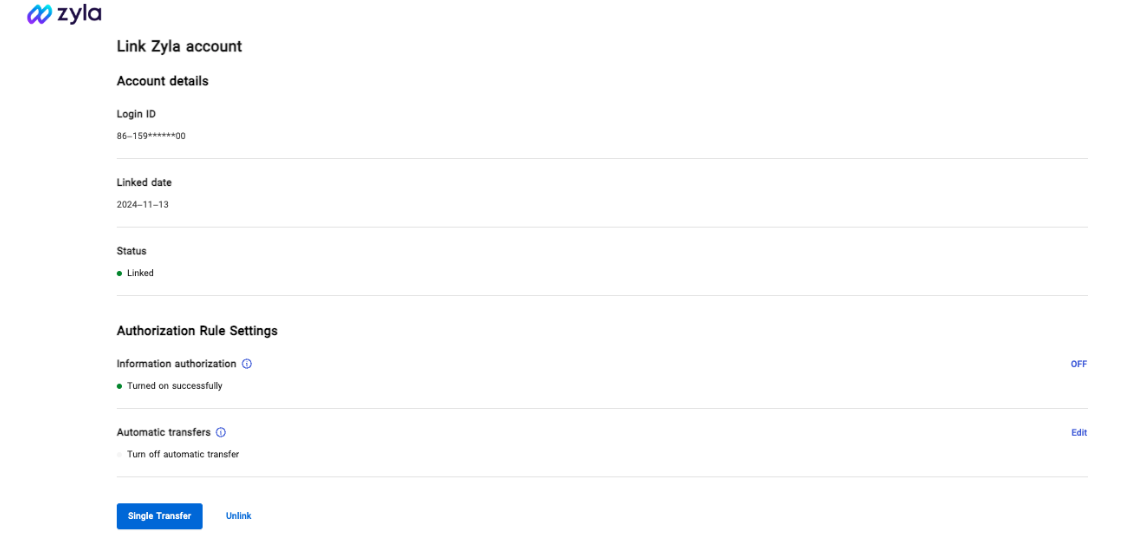
Sub-account fund collection (For management-connected relationship)
This relationship means the control falls witnin connected account. Login to the connected account, and go to “Multi-account Mangement”. There are two authorizations allowed to grant to management account(aka. primary account):
- Information Authorization: this authorization includes to allow management account to check connected account’s statement, and account balance.
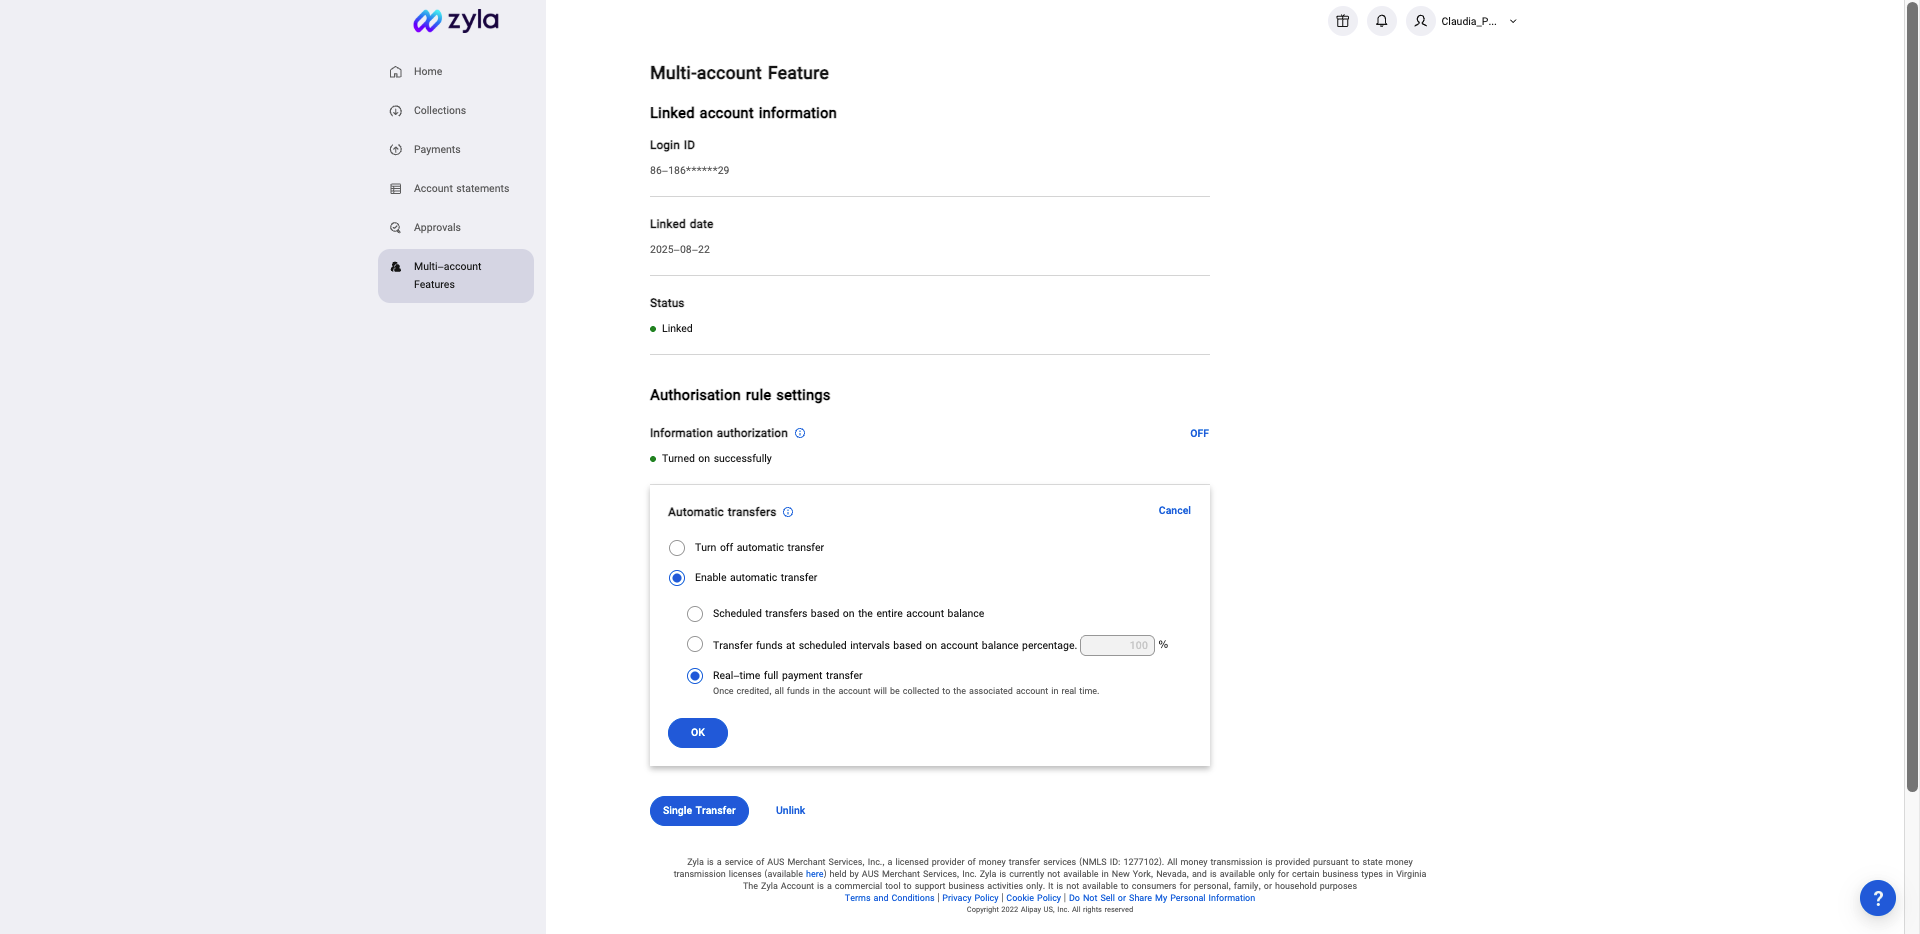
- Automatic transfer: Could be set up as turning on or off and while it is on, it is also to set up special rules.
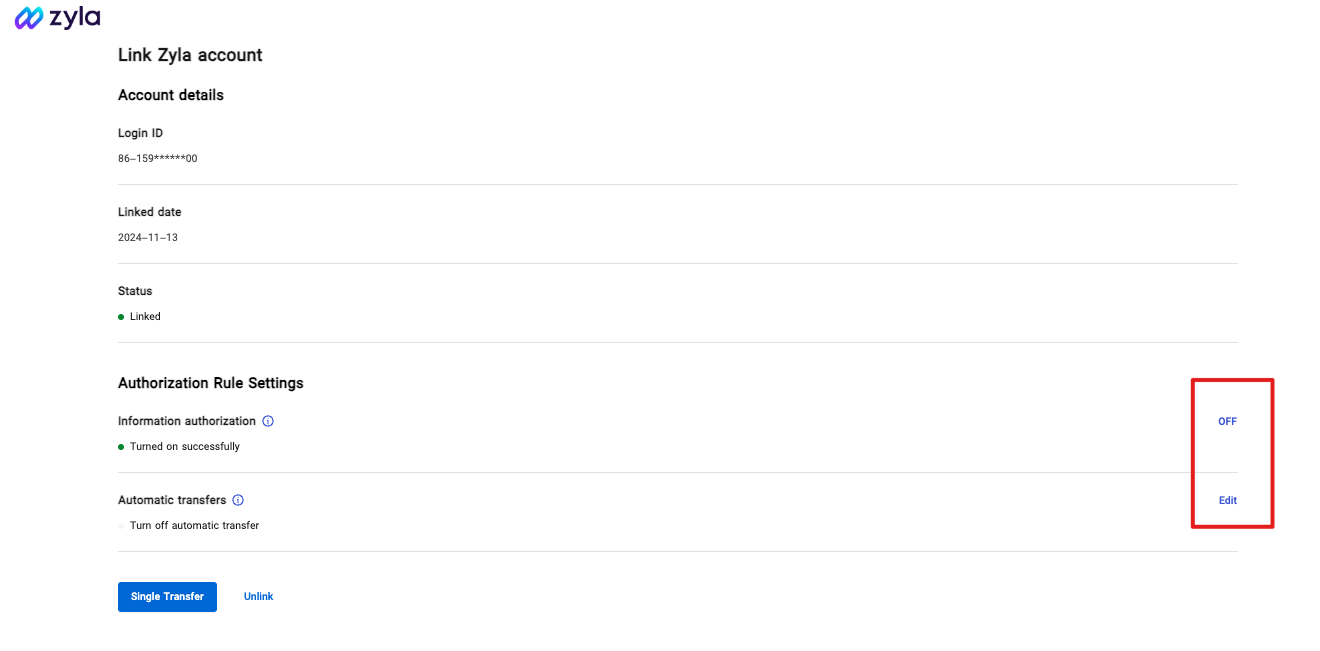
Automatic transfer rules:
When the “Automatic transfer” is turned on, it is able to set up transfer total balance of the connected account or by percentage.
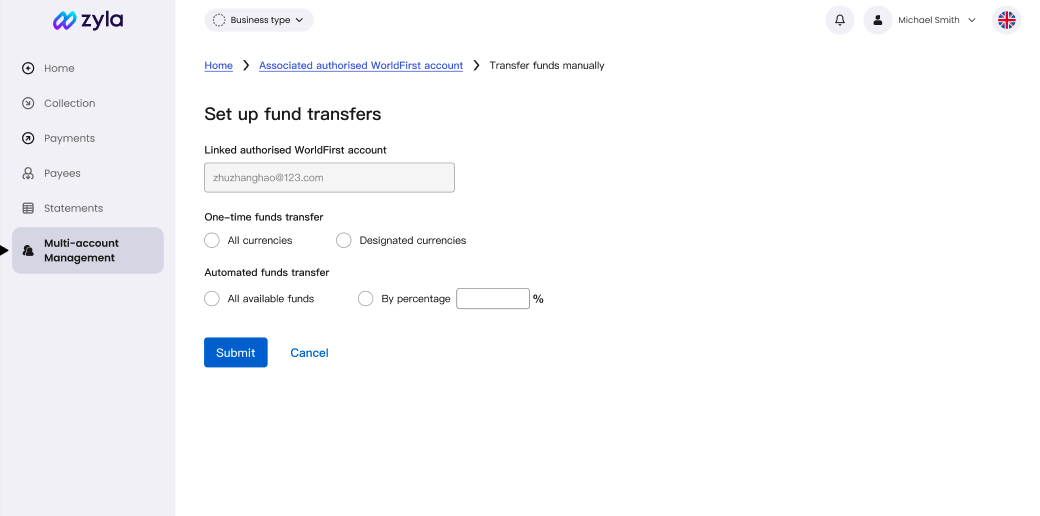
One-time fund transfer manually:
It is also available to use one-time fund transfer to make a fund transfer to the management account from connected account.
6. Disable multi-account management
If the master account needs to disable the multi-account management function
- Click the directory location “…”
- Select “Disable multi-account products”
- When disabling multi-account products, all sub-accounts will be unbound

- After the sub-account is unbound from the original main account, it will return to the single account status and there is no need to close it separately